
As the summer days start to fade and the school bells begin to ring, it’s time to celebrate the return to school with a delightful treat that will bring smiles to faces young and old! I’m talking about my Back to School Wafers Cookies—a fun and colorful way to kick off the school year. These wafer cookies are not only easy to make but also perfect for classroom celebrations, making them one of my favorite School Treats. Plus, if you’re looking for easy pasta recipes for quick family dinners, I’ve got you covered with some delicious options later on!
Why You’ll Love This Recipe
- Simple and quick to prepare, making them perfect for busy weeknights.
- Customizable with your favorite colors and decorations.
- Great for school parties, classroom treats, or just a fun family snack.
- Kids can get involved in the decorating process, making it a fun family activity.
- These cookies are a delightful way to celebrate the back-to-school season!
Ingredients
To make these delightful Wafer Cookies, you’ll need the following ingredients:
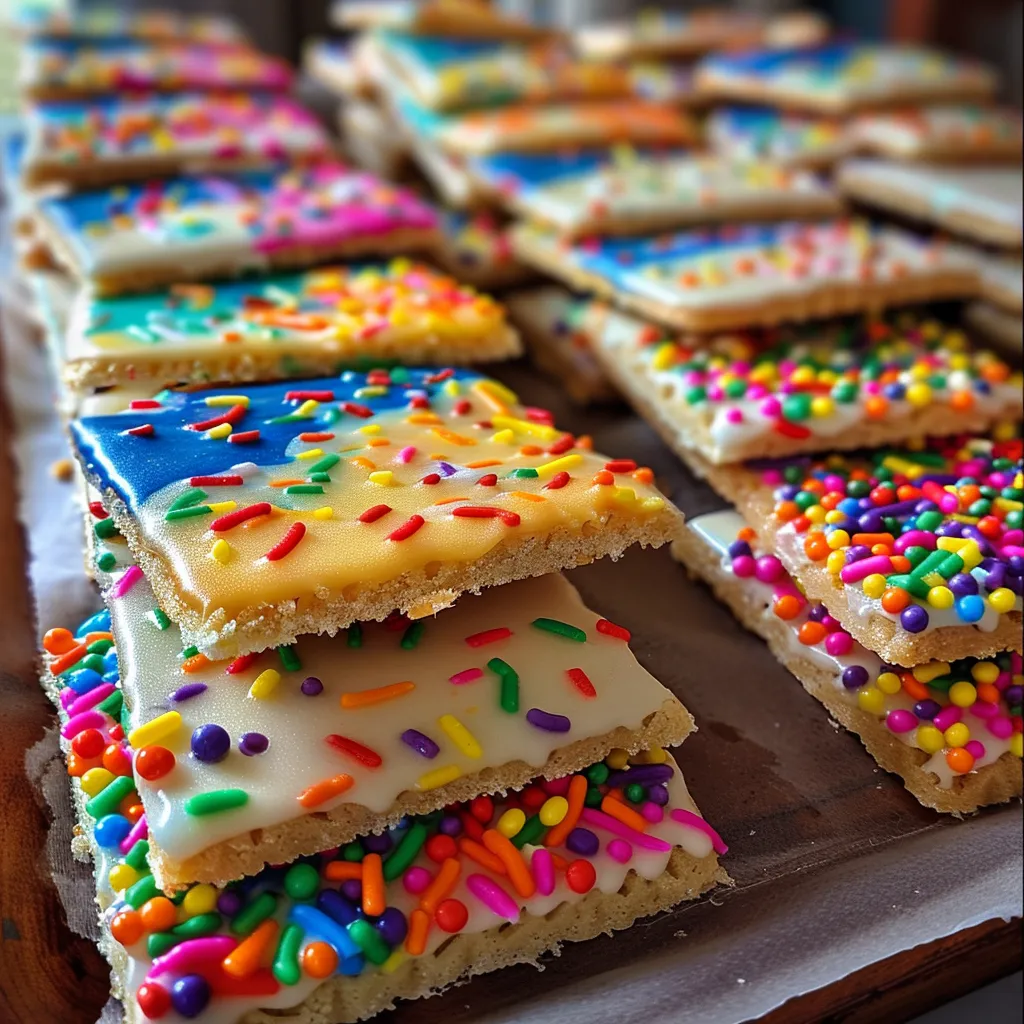
- Approximately 24-30 rectangular or square wafer cookies
- 12 oz (about 340g) Melting Wafers/Candy Melts in various school-themed colors
- A set of fine-tipped edible food markers in black and other bright colors
- Assorted Sprinkles
- 2-3 tablespoons Vegetable Shortening or Coconut Oil (for thinning candy melts if needed)
- Small ziplock bags or piping bags (for intricate drizzling)
- Parchment paper or wax paper
Full ingredient list with measurements is provided in the printable recipe card below.
How to Make the Recipe
Now, let’s dive into the fun part—making these delicious cookies!
- Step 1: Set Up Your Decorating Station
Gather all your ingredients and set up a clean workspace. Lay down some parchment or wax paper to catch any drips and make cleanup a breeze. - Step 2: Melt the Magic
In a microwave-safe bowl, melt your candy melts according to the package instructions. If the melts are too thick, add a little vegetable shortening or coconut oil to thin them out. - Step 3: Dip and Dazzle
Once melted, dip each wafer cookie halfway into the candy melts, allowing any excess to drip off. Place them on your prepared parchment paper. - Step 4: Chill Out (and Set)
Pop the dipped cookies into the refrigerator for about 15-20 minutes to let the chocolate set. - Step 5: Get Creative with Edible Markers
Once the chocolate is set, use your fine-tipped edible markers to draw fun school-themed designs on the cookies. Think apples, books, or even little smiley faces! - Step 6: Final Flourish (Optional)
If you want to add a little extra flair, sprinkle some colorful sprinkles on top of the melted chocolate before it sets.
Pro Tips for Making the Recipe
Here are some of my favorite tips to ensure your Back to School Wafers Cookies turn out perfectly:
- Experiment with different colors of candy melts to match your school’s colors or your child’s favorite hues.
- For a fun twist, try adding a layer of peanut butter or Nutella between two wafers before dipping!
- Make sure to let the melted candy cool slightly before dipping to avoid any mess.
- Encourage your kids to get creative with their designs—there’s no wrong way to decorate!
How to Serve
These cookies are perfect for any occasion! Serve them at school parties, pack them in lunchboxes, or enjoy them as a sweet snack after school. They also make great gifts for teachers or classmates. Just stack them in a cute box or bag, and you’re all set!
Make Ahead and Storage
If you want to get a head start on your baking, these cookies can be made ahead of time! Store them in an airtight container at room temperature for up to a week. If you want to keep them fresh for longer, you can also freeze them for up to a month. Just make sure to separate layers with parchment paper to prevent sticking.
So, as you prepare for the back-to-school season, don’t forget to whip up these delightful Sweet Treats. They’re sure to be a hit with kids and adults alike! And if you’re looking for more delicious Dessert Recipes, check out my Decadent Chocolate Cake, Moist Chocolate Cake, and Ultimate Chocolate Indulgence Cake for more sweet inspiration. Happy baking!
Back to School Wafers Cookies
Ingredients
Method
- Set up your decorating station with all supplies.
- Melt the candy wafers with shortening or coconut oil until smooth.
- Chill the cookies until the coating is firm.
- Use edible markers to draw school-themed designs and add sprinkles.
- Optional: add final details with drizzles or additional decorations.