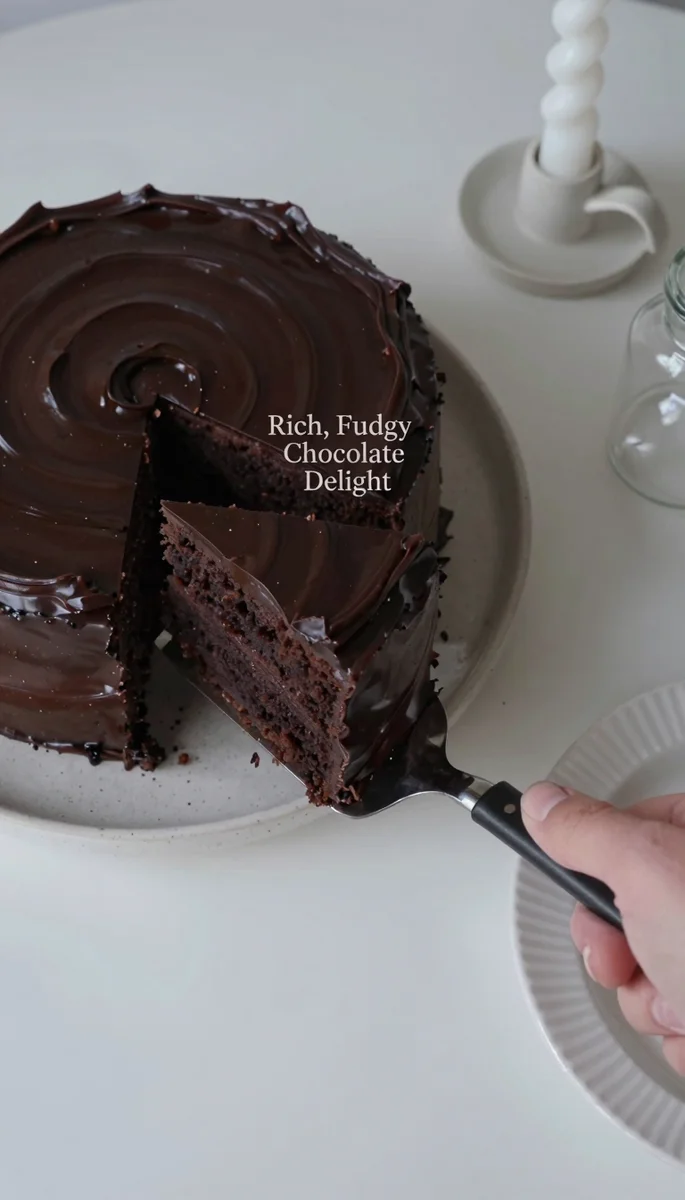
A Decadent Escape for Busy Weeknights
As a working mom of two from the Midwest, I know firsthand how challenging it can be to keep everything running smoothly. Between school pickups, dinner prep, and a full-time job, it felt like we were constantly on the go. There was a time when takeout was our go-to solution more often than I’d care to admit, mostly because by 5 PM, my energy reserves were completely depleted. That’s when I discovered the absolute magic of meal prepping. It’s not just about dinners; it’s about creating an efficient system for everything, including those special treats that make life a little sweeter.
I now dedicate a couple of hours every Sunday to what I affectionately call “Operation: Stress-Free Week.” This involves chopping vegetables, batch-cooking grains, and sometimes, even baking a delicious dessert that we can enjoy throughout the week. It’s amazing how much calmer our evenings are when there’s a plan, and even more so when there’s something truly special waiting in the fridge. This Matilda Chocolate Cake recipe is a prime example of how a bit of organized effort can yield truly magnificent results. It’s rich, it’s fudgy, and it’s perfectly moist — exactly the kind of satisfying dessert that transforms an ordinary Tuesday into something extraordinary.
This isn’t just a recipe; it’s a strategy. It’s about empowering you to create something incredible without adding extra pressure to your already packed schedule. We’ll break down each step so it’s manageable, allowing you to either bake it all at once or prep components ahead of time. Imagine having slices of this amazing chocolate cake ready to go, waiting patiently in your tupperware for when you need a little pick-me-up. That’s the kind of realistic, budget-friendly approach to baking I’m all about, keeping your family fed and your evenings open for what truly matters.
Table of Contents
- A Decadent Escape for Busy Weeknights
- Why This Recipe Works for Your Organized Kitchen
- Gather Your Essentials: Ingredients for the Perfect Matilda Cake
- Your Blueprint for Baking Success: Step-by-Step Instructions
- Olivia’s Organized Kitchen Pro Tips for Matilda Cake Mastery
- Flexible Baking: Variations & Smart Substitutions
- Your Matilda Cake Questions, Answered: An Organized FAQ
- A Sweet Reward for Your Efforts: Final Thoughts
Why This Recipe Works for Your Organized Kitchen
When I commit to a recipe, especially one that requires a bit more effort than a weeknight stir-fry, it has to be worth it. This Matilda Chocolate Cake recipe has earned its permanent spot in my meal prep rotation because it consistently delivers on several key fronts, making it a fantastic choice for anyone looking to bake efficiently.
Unbelievably Moist and Fudgy Texture: This isn’t just any chocolate cake; it’s a truly decadent experience. The secret lies in a combination of ingredients that work synergistically to create an intensely moist and rich crumb. Dark brown sugar contributes molasses for extra moisture, while oil — rather than just butter — ensures a tender texture that stays fresh longer. The addition of hot coffee doesn’t make the cake taste like coffee; instead, it dramatically deepens the chocolate flavor, intensifying its complexity. Furthermore, the “buttermilk” — milk mixed with vinegar — reacts with the baking soda, creating a lighter crumb and contributing to that desirable moistness. It’s a carefully balanced formula that guarantees a superior result every single time.
Straightforward and Achievable Steps: Don’t let the impressive outcome intimidate you. This recipe is designed with efficiency in mind, making it perfectly suited for busy schedules. Each step is clear, concise, and builds logically upon the last. From preparing the “buttermilk” to combining the dry and wet ingredients, the process is streamlined. Even the frosting, which might seem complex, is broken down into manageable phases, allowing for efficient batch-cooking. You’ll find that with a little organization — gathering all your ingredients before you start, a practice I emphasize in all my meal prep — this cake comes together without a hitch, leaving you with a sense of accomplishment rather than exhaustion.
Impressive Yet Budget-Friendly Ingredients: One of my core principles for meal prepping is utilizing budget-friendly ingredients that are readily available. This Matilda Chocolate Cake fits that bill perfectly. It relies on pantry staples like flour, cocoa powder, sugar, milk, and eggs, avoiding expensive or hard-to-find specialty items. This means you can create a truly spectacular dessert without breaking the bank. The quality comes from the technique and the thoughtful combination of these common ingredients, proving that you don’t need a gourmet grocery list to achieve a gourmet taste. It’s a smart, economical choice for feeding your family something special without financial strain.
Gather Your Essentials: Ingredients for the Perfect Matilda Cake
Having all your ingredients measured and ready before you begin is a cornerstone of efficient baking. This “mise en place” approach, as they say in professional kitchens, prevents frantic searching mid-recipe and helps ensure a stress-free baking experience. Here’s what you’ll need to create this amazing Matilda Chocolate Cake:
For the Cake Layers:
- All-Purpose Flour: 2 ¼ cups (270g). The foundational structure of our cake. Ensure it’s properly spooned and leveled, not scooped directly from the bag, which can compact it.
- Unsweetened Cocoa Powder: ¾ cup (75g). Use a good quality unsweetened cocoa powder; it’s responsible for the cake’s deep chocolate flavor. Dutch-processed is fine, but natural cocoa powder works beautifully here too.
- Granulated Sugar: 1 ¾ cups (350g). Provides sweetness and helps with the cake’s tender crumb.
- Dark Brown Sugar: ½ cup (100g), packed. This is crucial for adding moisture and a subtle molasses flavor, contributing to the cake’s fudgy texture.
- Baking Powder: 2 teaspoons. Works with the baking soda for optimal lift and aeration.
- Baking Soda: 1 ½ teaspoons. This leavening agent reacts with the acid in the “buttermilk” and coffee to create a light, airy crumb.
- Salt: 1 teaspoon. Essential for balancing the sweetness and enhancing the chocolate notes. Don’t skip it!
- Large Eggs: 3, at room temperature. Binds the ingredients and adds richness. Room temperature eggs emulsify better with other liquids.
- Vegetable Oil: ½ cup (120ml). Any neutral-flavored oil like canola or sunflower oil works. Oil contributes significantly to the cake’s moistness and keeping quality.
- Milk: 1 cup (240ml), at room temperature. Whole milk is preferred for richness, but 2% works too. Room temperature is key for a smooth batter.
- White Vinegar: 1 tablespoon. Combined with the milk, it creates a quick “buttermilk” substitute, providing the necessary acid for the baking soda to activate.
- Hot Coffee: 1 cup (240ml). Brewed strong, it enhances the chocolate flavor without imparting a coffee taste. It also thins the batter to the perfect consistency.
- Vanilla Extract: 2 teaspoons. A high-quality vanilla extract complements and deepens the chocolate profile.
For the Chocolate Fudge Frosting:
- Unsweetened Cocoa Powder: ¾ cup (75g). Again, a good quality cocoa is essential for rich chocolate flavor.
- Cornstarch: 3 tablespoons. Acts as a thickener, giving the frosting its luscious, pudding-like consistency.
- Granulated Sugar: 1 ½ cups (300g). For sweetness and structure in the frosting.
- Salt: ¼ teaspoon. Balances the sweetness and amplifies the chocolate.
- Milk: 1 ½ cups (360ml). The liquid base for our cooked frosting.
- Unsalted Butter: 1 ½ sticks (170g), at room temperature, cut into cubes. Adds richness and a smooth texture.
- Good Quality Chocolate: 6 ounces (170g), finely chopped. Semi-sweet or dark chocolate chips or a chopped bar will work. This melts into the frosting, contributing to its fudginess. If you’re interested in truly premium options, you might even consider exploring what makes special Dubai chocolate so unique for an extra decadent touch here.
- Vanilla Extract: 1 teaspoon. To round out the flavors in the frosting.
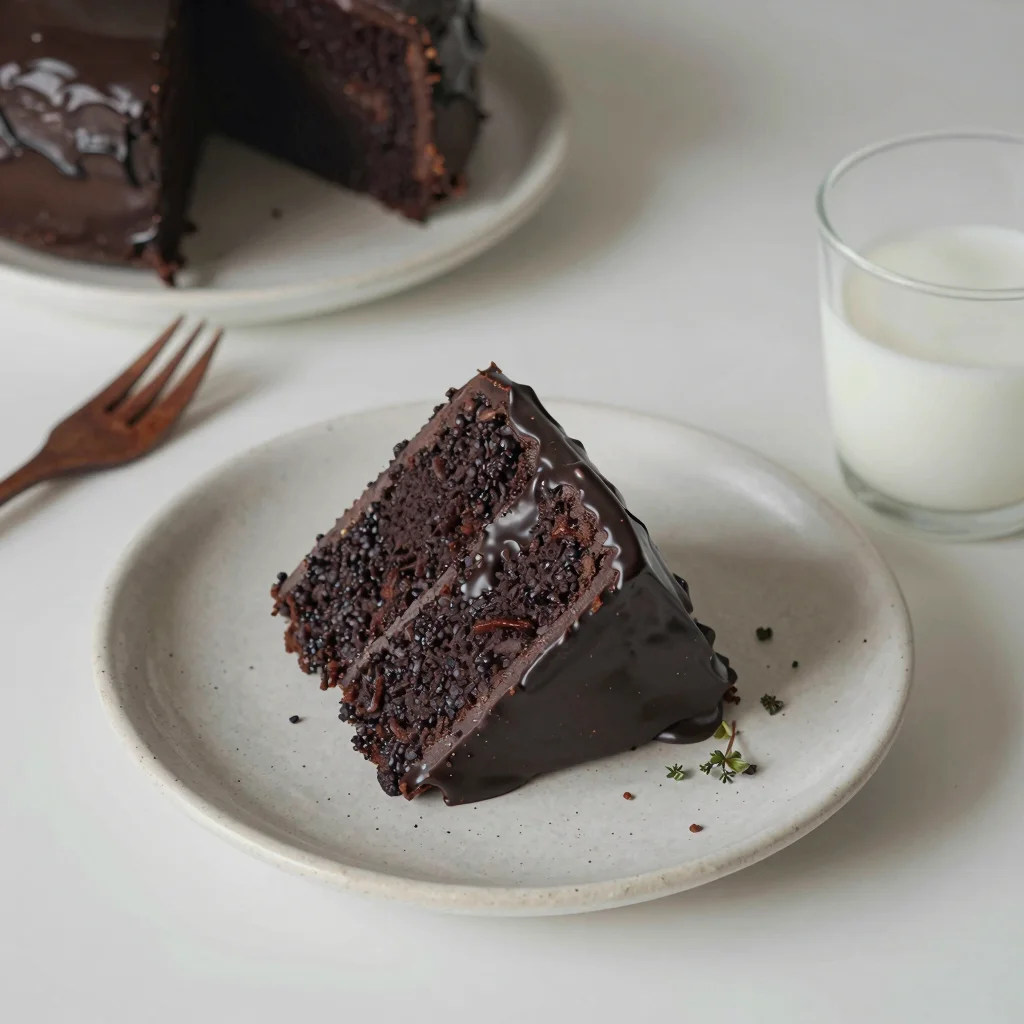
Your Blueprint for Baking Success: Step-by-Step Instructions
Baking this Matilda Chocolate Cake is a systematic process, and following these steps precisely will lead to a truly magnificent outcome. Remember, an organized approach is your best friend in the kitchen!
Part 1: Preparing the Cake Layers
Prepare Your Pans: Preheat your oven to 350°F (175°C). Grease and flour three 8-inch round cake pans. For extra security against sticking, line the bottoms of the pans with parchment paper circles. This is a crucial step for stress-free cake removal later.
Make the “Buttermilk”: In a medium liquid measuring cup or bowl, combine 1 cup of room temperature milk with 1 tablespoon of white vinegar. Stir gently and let it sit for 5-10 minutes. The milk will curdle slightly — this is exactly what you want!
Whisk Dry Ingredients: In a very large mixing bowl, combine the all-purpose flour, unsweetened cocoa powder, granulated sugar, dark brown sugar, baking powder, baking soda, and salt. Use a whisk to thoroughly combine these ingredients, breaking up any lumps, especially in the brown sugar. This ensures even distribution of leavening agents.
Combine Wet Ingredients (Except Coffee): In a separate large bowl, whisk together the 3 room temperature eggs until slightly frothy. Then, add the prepared “buttermilk” mixture, ½ cup vegetable oil, and 2 teaspoons vanilla extract. Whisk until everything is well combined and uniform.
Marry Wet and Dry: Pour the wet ingredients into the bowl with the dry ingredients. Using a whisk or a rubber spatula, mix until just combined. Be careful not to overmix; overmixing develops gluten and can lead to a tough, dry cake. A few small lumps are perfectly acceptable at this stage.
Incorporate Hot Coffee: Carefully pour the 1 cup of hot coffee into the chocolate cake batter. Whisk gently until the coffee is fully incorporated and the batter is smooth and pourable. The batter will become noticeably thinner — this is correct and contributes to the cake’s incredible moisture.
Divide and Bake: Divide the batter equally among your three prepared cake pans. I often use a kitchen scale for this to ensure even layers, which makes assembly much easier. Place the pans into the preheated oven and bake for 25-30 minutes, or until a wooden skewer or toothpick inserted into the center of a cake comes out clean or with a few moist crumbs attached.
Cool the Layers: Once baked, remove the cakes from the oven and let them cool in their pans on a wire rack for about 15-20 minutes. This allows them to firm up slightly. After this initial cooling, carefully invert the cakes onto the wire racks, remove the parchment paper, and let them cool completely. This is a crucial step — trying to frost warm cakes will result in a messy, melted frosting situation.
Part 2: Crafting the Decadent Fudge Frosting
Prepare Dry Frosting Mix: In a medium saucepan, sift together ¾ cup unsweetened cocoa powder, 3 tablespoons cornstarch, 1 ½ cups granulated sugar, and ¼ teaspoon salt. Sifting is important to prevent lumps in your frosting.
Add Liquids and Cook: Gradually whisk in 1 ½ cups milk until the mixture is smooth and lump-free. Place the saucepan over medium heat and cook, whisking constantly, until the mixture thickens significantly and comes to a gentle boil. It should be thick enough to coat the back of a spoon. This process usually takes about 5-8 minutes. Continue to cook, stirring, for another minute after it thickens to ensure the cornstarch is fully activated.
Cool the Base: Remove the saucepan from the heat. Add the 6 ounces of finely chopped chocolate and 1 teaspoon vanilla extract. Stir until the chocolate is completely melted and the mixture is smooth and glossy. Transfer this chocolate mixture to a clean bowl, cover it directly with plastic wrap (to prevent a skin from forming), and let it cool completely to room temperature. This can take several hours, or you can speed it up in the refrigerator, stirring occasionally.
Whip in Butter: Once the chocolate mixture is completely cool, place it in the bowl of a stand mixer fitted with the paddle attachment (or use a large bowl with a hand mixer). Add the 1 ½ sticks of room temperature unsalted butter, cut into cubes. Beat on medium-high speed for 5-7 minutes, scraping down the sides of the bowl as needed, until the frosting is incredibly light, fluffy, and spreadable. It will transform from a dense mixture into a truly luxurious fudge frosting.
Part 3: Assembling Your Masterpiece
Level Your Cakes: If your cake layers have domed tops, use a serrated knife to carefully level them, creating flat surfaces. This ensures a stable and professional-looking cake.
Stack and Frost: Place one cake layer on your serving plate or cake stand. Spread about ¾ to 1 cup of the chocolate fudge frosting evenly over the top. Place the second cake layer on top, press gently, and repeat with another layer of frosting. Add the third cake layer. Use the remaining frosting to cover the top and sides of the entire cake. Use an offset spatula or bench scraper to smooth the frosting for a polished finish.
Chill (Optional but Recommended): For cleaner slices and a firmer frosting, chill the cake in the refrigerator for at least 30 minutes before serving. This also helps the flavors meld beautifully. Store any leftovers in an airtight container at room temperature for up to 2 days, or in the refrigerator for up to 5 days.
Olivia’s Organized Kitchen Pro Tips for Matilda Cake Mastery
Over my years of balancing family and a career, I’ve learned that the little details can make a huge difference in the kitchen, especially when you’re aiming for stress-free, efficient results. These pro tips are designed to help you achieve the perfect Matilda Chocolate Cake every single time, making your baking process smoother and the outcome even more impressive.
Room Temperature Ingredients are Non-Negotiable: This might sound like a minor detail, but it’s critically important for both the cake and the frosting. Room temperature eggs, milk, and butter emulsify much more effectively with other ingredients, creating a smoother, more uniform batter and a silkier frosting. Cold ingredients can cause your batter to seize or curdle, leading to a less consistent texture in the final product. Plan ahead by taking these items out of the refrigerator an hour or two before you begin baking. This simple step contributes significantly to a truly professional-quality cake and ensures your efforts are rewarded with superior results.
The Power of Hot Coffee: Many bakers are surprised by the inclusion of hot coffee in chocolate cake recipes, but trust me, it’s a game-changer. The coffee doesn’t make your cake taste like a mocha; instead, it acts as a flavor enhancer, deepening and intensifying the chocolate notes to an incredible degree. It also helps to thin the batter to the perfect pourable consistency, contributing to the cake’s moistness. Don’t substitute with cold coffee or water unless absolutely necessary, as the hot liquid interacts differently with the cocoa powder, “blooming” its flavor. For other efficient baking projects that benefit from smart ingredient choices, consider my guide on how to make the best chocolate chip cookies — where ingredient temperature and quality are also key!
Don’t Overmix, Seriously: This is a common pitfall in cake baking. Once you combine the wet and dry ingredients, mix only until just combined — meaning no visible streaks of flour remain. Overmixing develops the gluten in the flour, which can lead to a dense, tough, and dry cake, even with all the moist-making ingredients we’ve included. A few small lumps in the batter are perfectly fine; they’ll disappear during baking. Practice a gentle hand here for a tender, delicate crumb.
Patience with Frosting Cooling: The biggest mistake people make with cooked fudge frosting is rushing the cooling process. For this frosting to whip up light and fluffy, the cooked chocolate base must be completely cool to room temperature. If it’s even slightly warm, it will melt the butter you add later, resulting in a greasy, soupy mess rather than a rich, spreadable frosting. Plan this step strategically: you can make the cooked base several hours ahead of time, or even the day before, and let it cool on the counter or in the refrigerator (stirring occasionally to prevent a skin from forming). This is where batch-cooking principles really shine, allowing you to break down the task and ensure a stress-free outcome.
Flexible Baking: Variations & Smart Substitutions
One of the beauties of meal prepping and organized cooking is the ability to adapt recipes to fit your family’s preferences or dietary needs without compromising on flavor or quality. This Matilda Chocolate Cake recipe is wonderfully flexible, allowing for several variations and smart substitutions. Remember, baking is a science, so some adjustments may alter the final texture slightly, but these suggestions will keep your cake delicious.
Dairy-Free/Vegan Options: For a dairy-free cake, simply substitute the cow’s milk with your favorite plant-based milk (almond, soy, or oat milk work well). Ensure your chocolate for the frosting is dairy-free as well. For a fully vegan version, you’ll need to replace the eggs. Flax eggs (1 tablespoon ground flaxseed meal mixed with 3 tablespoons water per egg, let sit for 5 minutes) can work, though the cake’s texture might be slightly denser. For the frosting, use a good quality vegan butter substitute and dairy-free chocolate. If you’re exploring other plant-based baking, you might find inspiration from recipes like our flourless ginger cake, which naturally accommodates dietary considerations.
Gluten-Free Adaptation: While I haven’t specifically tested this recipe with gluten-free flour, many readers have reported success using a 1:1 gluten-free all-purpose baking blend (one that contains xanthan gum). Follow the instructions as written, but be mindful that gluten-free batters can be more delicate. The texture might be slightly different, but the rich chocolate flavor will still shine through. Always ensure your cocoa powder is certified gluten-free if allergies are severe.
Frosting Flavor Twists: While the classic fudge frosting is unparalleled, you can certainly experiment. A cream cheese frosting would offer a tangy contrast, or a simple chocolate ganache (equal parts hot cream and chopped chocolate) could be drizzled over the top for an extra layer of decadence. You could also add a hint of espresso powder to the frosting for an even deeper chocolate experience, or a dash of peppermint extract for a festive twist.
Adding Mix-ins: For an extra layer of texture and flavor, consider folding ½ cup of mini chocolate chips, chopped nuts (pecans or walnuts), or even a tablespoon of espresso powder directly into the cake batter before dividing it into pans. This can add a delightful surprise with every bite. To make this cake even more visually appealing, especially for special occasions, you can explore fun celebration cake ideas, adapting this base recipe for different designs.
Cupcakes or Sheet Cake: This versatile batter can easily be adapted for cupcakes or a sheet cake. For cupcakes, line muffin tins with paper liners and fill them about two-thirds full. Bake for 18-22 minutes, adjusting as needed. For a 9×13 inch sheet cake, bake for approximately 35-45 minutes. Always check for doneness with a toothpick. This adaptability makes it fantastic for batch-cooking for larger gatherings or for simpler, individual portions for your weekly meal prep.
Your Matilda Cake Questions, Answered: An Organized FAQ
As a busy mom, I know questions pop up, especially when you’re trying a new recipe or planning your week’s baking. Here are some of the most common inquiries about this Matilda Chocolate Cake, answered with an organized approach to help you out.
Q: Can I make this Matilda Chocolate Cake ahead of time for efficient meal prepping?
A: Absolutely! This cake is incredibly well-suited for making ahead. The cake layers can be baked, cooled completely, wrapped tightly in plastic wrap, and stored at room temperature for up to 2 days, or frozen for up to 2-3 months. If freezing, I recommend wrapping them first in plastic wrap and then in aluminum foil to prevent freezer burn. The fudge frosting can also be made ahead; once cooked and cooled, cover it tightly and refrigerate for up to 5 days. When you’re ready to frost, let the frosting come to room temperature and then re-whip it with your stand mixer or hand mixer until it’s light and fluffy again. This batch-cooking strategy is a game-changer for stress-free entertaining or simply having a delicious dessert ready for your family.
Q: How should I store leftover Matilda Chocolate Cake to keep it fresh?
A: To maintain its incredible moisture and flavor, store any leftover cake in an airtight container. At room temperature, it will stay fresh and delicious for 2-3 days. If you need it to last longer, or if your kitchen is particularly warm, you can refrigerate the cake for up to 5-7 days. Just be sure to bring it back to room temperature for about 30 minutes before serving for the best texture and flavor. This organized storage ensures no delicious slice goes to waste!
Q: My cake turned out dry. What went wrong?
A: A dry cake is often the result of one of a few common issues. The most frequent culprit is overbaking; ovens can vary, so always trust the toothpick test — remove the cakes when it comes out with moist crumbs, not completely clean. Another factor could be overmixing the batter, which develops too much gluten and leads to a tough texture. Ensure you mix only until the flour streaks disappear. Lastly, accurate ingredient measurements are key, especially with flour. Using too much flour can significantly dry out a cake. Utilizing a kitchen scale for dry ingredients can help ensure precision. For another easy batch dessert that is hard to get wrong, consider making spooky mummy brownies — they’re always a hit!
Q: Can I halve or double this recipe for different needs?
A: Yes, this recipe can be halved or doubled with careful measurement. If halving, you’ll likely need one 8 or 9-inch round cake pan (adjusting baking time as needed) or a smaller square pan. When doubling, ensure you have sufficiently large bowls and enough oven space for two sets of three pans, or bake in batches. Always use a kitchen scale for precise measurements when adjusting recipes, as simply estimating can lead to inconsistent results. This flexibility is another way to make this recipe work seamlessly within your organized kitchen system.
A Sweet Reward for Your Efforts: Final Thoughts
There’s something incredibly satisfying about creating something truly special from scratch, especially when it fits perfectly into an efficient, organized lifestyle. This Matilda Chocolate Cake isn’t just a dessert; it’s a testament to the power of thoughtful planning and a little dedicated time in the kitchen. For me, as a working mom, it embodies the very essence of meal prepping — investing a bit of effort upfront to reap significant rewards throughout the week, freeing up those precious evening hours for family time or simply a moment of peace.
This recipe consistently delivers a rich, moist, and utterly decadent experience that will impress anyone who tries it. It proves that you don’t need to sacrifice quality or flavor when striving for efficiency. By following these clear, step-by-step instructions and incorporating my organized kitchen pro tips, you’ll be able to bake this fantastic fudge cake with confidence and ease. Having a slice of this magnificent cake waiting in your tupperware after a long day is a simple, yet powerful, form of self-care and family care.
So, clear your counter, gather your ingredients, and give this Matilda Chocolate Cake a try. You’ll not only create an amazing dessert but also reinforce the value of an organized approach to all aspects of your busy life. I’m confident it will become a much-requested staple in your home, bringing deliciousness and a sense of accomplishment to your table. Let me know how it transforms your weeknights — I always love hearing about your baking successes!

Matilda Chocolate Cake
Ingredients
Method
- Step one: Preheat oven to 350°F (175°C), then grease and line three 8-inch cake pans with baking paper.
- Step two: In a jug, combine room temperature milk and white vinegar, then set aside to curdle.
- Step three: In a large bowl, whisk together flour, cocoa powder, baking powder, baking soda, granulated sugar, dark brown sugar, and salt until no lumps remain. Set aside.
- Step four: In another large bowl, whisk eggs, then add the milk-vinegar mixture, oil, and vanilla extract. Whisk until well combined.
- Step five: Pour the wet ingredients into the dry ingredients and whisk until a thick chocolate cake batter forms.
- Step six: Gradually whisk hot coffee into the batter until combined; the batter will become more liquid.
- Step seven: Divide the batter equally among the three prepared cake pans.
- Step eight: Bake for 25-30 minutes, or until a toothpick inserted into the center comes out with a few moist crumbs.
- Step nine: Cool cakes in pans for 15-20 minutes, then transfer to a wire rack to cool completely.
- Step ten: To make the frosting, sift cocoa powder and cornstarch into a pot. Add a pinch of salt and granulated sugar, then whisk to combine.
- Step eleven: Gradually whisk cold milk into the pot until all milk is added and the mixture is thick.
- Step twelve: Heat the mixture over low-medium heat, whisking continuously, until it gently bubbles and thickens.
- Step thirteen: Once visibly thickened, remove from heat. Add chopped chocolate and whisk until melted into the hot sauce.
- Step fourteen: Once chocolate is melted, add cold butter and whisk until dissolved. Stir in vanilla extract.
- Step fifteen: Let the fudge frosting cool for 30 minutes at room temperature, then 30 minutes in the fridge until nicely thickened but not too stiff.
- Step sixteen: Place the first cake layer on a turntable, spread a thick, even layer of frosting on top.
- Step seventeen: Add the second layer and repeat frosting, then repeat with the final layer.
- Step eighteen: Chill the stacked cake for 15-20 minutes to set, then remove and cover the entire cake with the remaining frosting.
- Step nineteen: Serve with a glass of cold milk and enjoy!
Notes
Loved this recipe? Save it to your favorite Pinterest board so you can easily find it later! ✨