Sweet & Stylish: Crafting Your Pink Brown Cake & Dessert Logo
Discover sweet inspiration with our cute pink and brown circle logo, perfect for bakeries, dessert shops, or a charming recipe website brand.
A Culinary Canvas: Embracing the Art of Planned Deliciousness
As a passionate advocate for thoughtful meal planning, I’ve always viewed the kitchen as a boundless realm for creative expression. My journey began with a simple desire: to nourish myself and my loved ones with wholesome, vibrant foods, while also exploring the vast tapestry of global cuisines. What I quickly discovered was that the secret to culinary adventure, without feeling overwhelmed, lay in structure. Planning transformed my cooking from a chore into an exciting anticipation, teaching me how to expertly balance nutritional goals with adventurous flavors and practical ease. This philosophy extends beyond everyday dinners; it’s about approaching every culinary endeavor, even a seemingly simple cake, with intention and artistic vision.
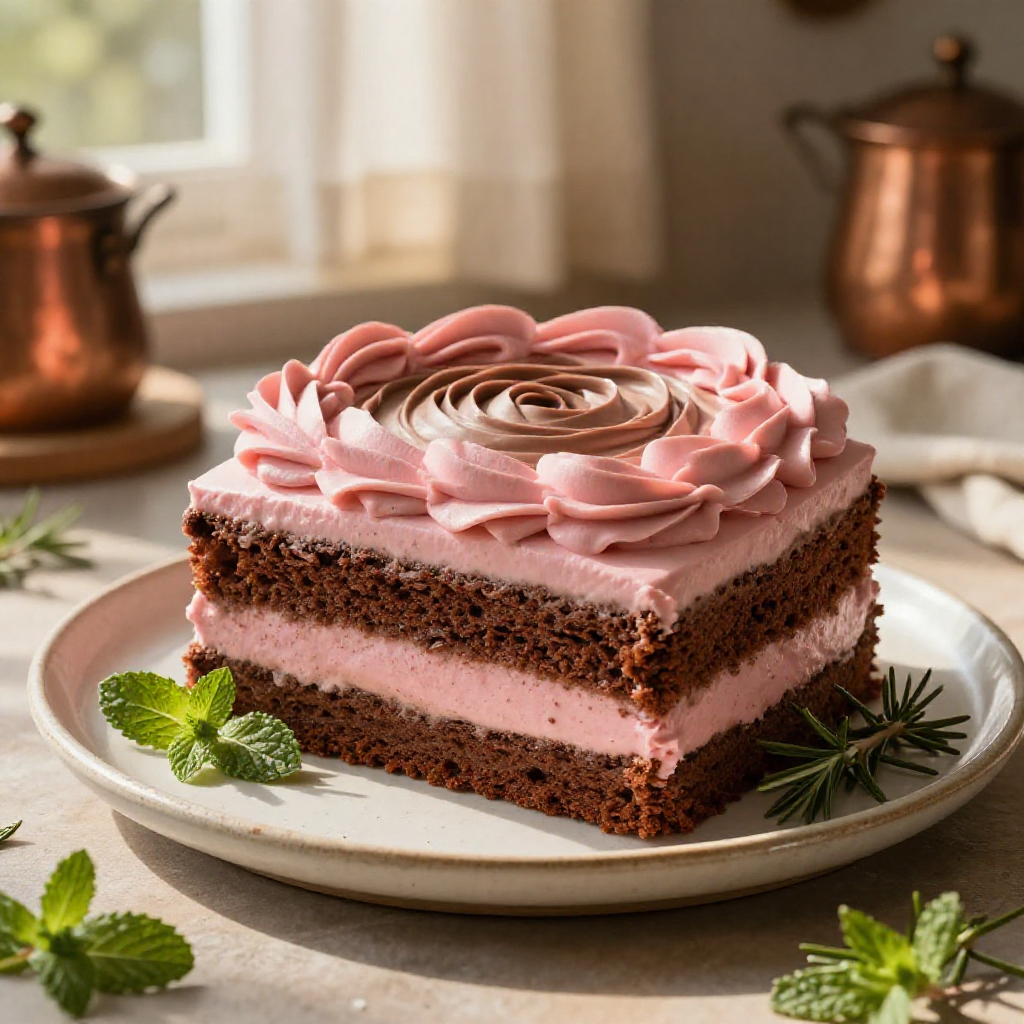
Today, we’re not just baking a cake; we’re crafting a statement. We’re translating a concept – the essence of a brand, a personal aesthetic, or a memorable occasion – into an edible art piece. This particular creation, our Pink Brown Cute Circle Cake, is a fantastic example of how a well-executed plan can yield something both visually striking and utterly delicious. It’s about taking basic ingredients and, with a bit of foresight and decorative flair, elevating them into something truly special that communicates elegance and whimsy. Imagine the impact of presenting a dessert that looks as meticulously designed as a professional emblem!
This endeavor perfectly encapsulates my belief that healthy eating and culinary exploration are not just tasks, but an ongoing source of personal fulfillment and delightful discovery. Every ingredient chosen, every step followed, contributes to a cohesive and appealing final product. This cake isn’t just a dessert; it’s a testament to the power of planned deliciousness, proving that even a box mix can be transformed into a sophisticated, eye-catching centerpiece with a bit of creative ingenuity and a sprinkle of magic.
Table of Contents
- A Culinary Canvas: Embracing the Art of Planned Deliciousness
- Why This Recipe Works
- Ingredients You’ll Need
- Step-by-Step Instructions for Your Edible Emblem
- Pro Tips for Perfection
- Variations & Substitutions: Unleash Your Creativity
- Frequently Asked Questions
- Final Thoughts: Your Culinary Signature Awaits
Why This Recipe Works
This particular cake creation stands out for several compelling reasons, making it an excellent choice for anyone looking to make a visual impact with their baking, whether for a personal project or a small business presentation.
- Effortless Elegance: Utilizing a cake mix simplifies the baking process immensely, allowing you to focus your energy on the artistic decoration. This means less time stressing over foundational baking and more time channeling your inner designer, ensuring a successful outcome even for novice bakers. The result is a cake that looks sophisticated without demanding advanced culinary skills.
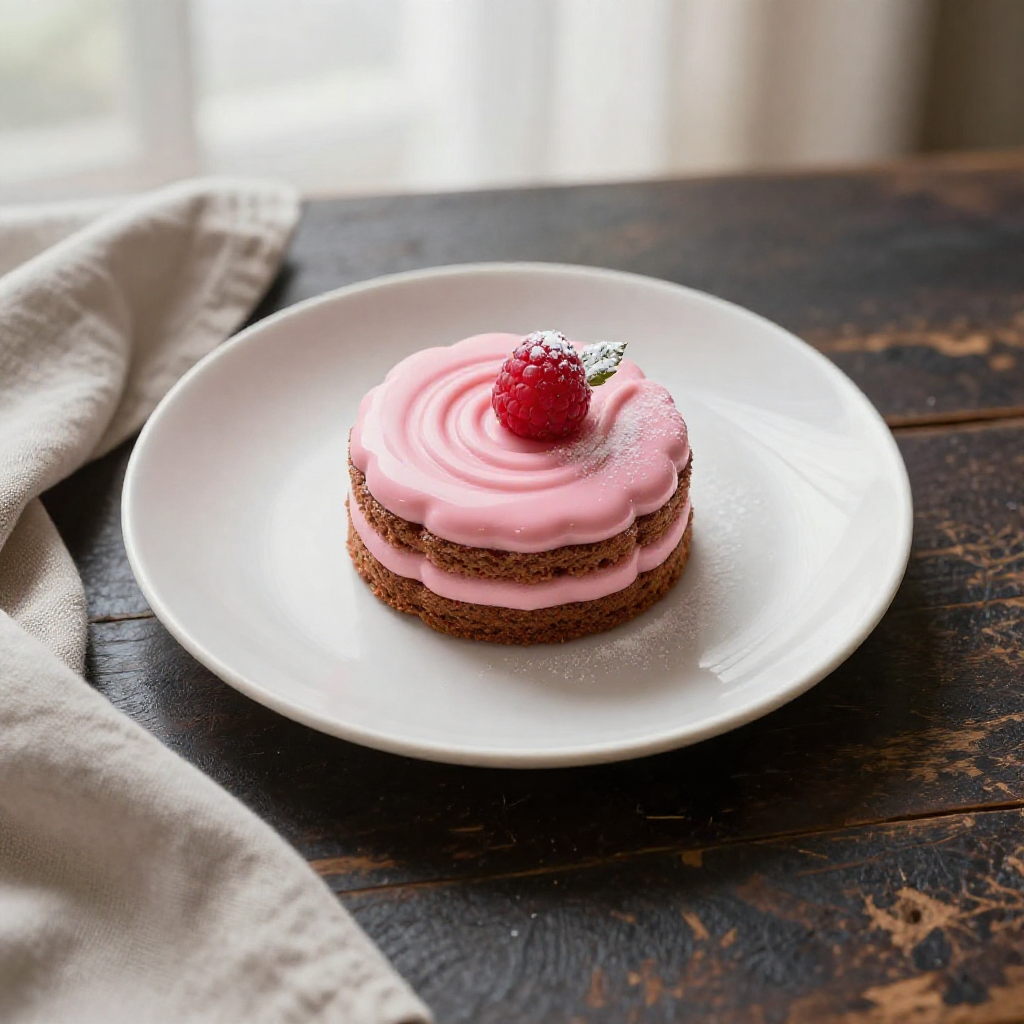
- Striking Visual Impact: The combination of pink and brown offers a chic, modern aesthetic that is both charming and professional. The circular shape naturally evokes a logo, making it perfect for branding events, business launches, or simply creating a memorable centerpiece. The addition of sprinkles and glitter elevates its appeal, transforming a simple dessert into a captivating focal point.
- Versatile Application: While perfect for a bakery’s branding showcase or a recipe website’s signature treat, this cake’s design flexibility means it can adapt to numerous occasions. It can serve as a birthday cake, an anniversary surprise, or even a thoughtful, personalized gift. Its adaptable nature means it’s always a suitable option when you want to make a statement.
Ingredients You’ll Need
Gathering your ingredients is the first step in any well-planned culinary endeavor. For this stunning Pink Brown Cute Circle Cake, we’re leveraging the convenience of a cake mix to give us a head start, allowing us to pour our creative energy into the decorative elements that truly make this cake distinctive. Opting for quality ingredients, even with a mix, can make a noticeable difference in the final texture and overall enjoyment of your creation.
- 1 box pink cake mix: Choose your favorite brand. The vibrant pink hue will be the foundation of our ‘logo’ effect.
- Water, oil, and eggs: As per cake mix instructions. These are the essential binders and moisteners that transform dry mix into a tender crumb.
- 1 can chocolate or brown frosting: A rich, deep chocolate or a creamy brown frosting will provide the perfect contrast to the pink cake, creating that signature two-tone ‘logo’ look. You can also make your own buttercream for an even more personalized flavor.
- Pink circular sprinkles: These are critical for reinforcing the circular ‘logo’ motif and adding a textural element. Look for sprinkles that are uniformly round for the best effect.
- Edible gold or silver glitter: A touch of sparkle elevates the cake from merely pretty to truly enchanting, giving it a professional, polished finish reminiscent of a high-end brand emblem.
- Non-stick baking spray: Essential for ensuring your beautifully baked cake releases cleanly from the pan, preserving its perfect circular shape.
Having all these components ready before you begin ensures a smooth, uninterrupted creative process, a principle I apply to all my meal planning. It’s about setting yourself up for success, allowing you to focus on the artistry rather than scrambling for missing items.
Step-by-Step Instructions for Your Edible Emblem
Creating this visually appealing cake is a straightforward process, even if you’re new to intricate decorating. The key is to approach each step with care and patience, allowing the cake to cool fully before frosting, which is paramount for a neat finish. Think of this as a guided artistic project, where each stage builds upon the last to create a cohesive and impressive final product.
1. Prepare Your Workspace and Pan
Begin by preheating your oven to the temperature specified on your pink cake mix box. This ensures a consistent baking environment from the moment your batter enters the oven. Next, select a round baking pan that will be the foundation for your ‘logo’ cake. Lightly spray the inside of the pan with non-stick baking spray, ensuring every crevice is covered. For an extra layer of non-stick insurance, you can also dust the sprayed pan with a little flour, tapping out any excess. This meticulous preparation prevents sticking and helps your cake maintain its pristine circular shape, which is crucial for the overall aesthetic.
2. Mix the Pink Batter
In a spacious mixing bowl, combine the pink cake mix with the exact amounts of water, oil, and eggs as directed on the packaging. Use an electric mixer on a medium speed, or a whisk for a more manual approach, to blend the ingredients until the batter is smooth and free of large lumps. Be careful not to overmix, as this can lead to a tougher cake texture. Mix just until everything is incorporated, creating a uniformly colored pink batter that promises a tender, fluffy cake.
3. Bake to Perfection
Carefully pour the prepared pink batter evenly into your round baking pan. Gently tap the pan on your counter a few times to release any trapped air bubbles, which can cause large holes in your cake. Place the pan into your preheated oven and bake according to the package directions. Baking times can vary slightly depending on your oven, so keep an eye on it. The cake is ready when a wooden skewer or toothpick inserted into the center comes out clean. This indicates that the cake is cooked through and moist. Once baked, remove the cake from the oven and allow it to cool in the pan on a wire rack for about 10-15 minutes before inverting it onto the rack to cool completely. Patience here is a virtue; a fully cooled cake is much easier to frost neatly.
4. Frost with Rich Brown
Once your pink cake has completely cooled – this step cannot be rushed, or your frosting will melt and slide – it’s time to apply the chocolate or brown frosting. Open your can of frosting and stir it gently to ensure a smooth, spreadable consistency. Using an offset spatula or a butter knife, carefully spread the chocolate or brown frosting evenly over the top and sides of the round cake. Aim for a smooth, consistent layer that fully covers the pink cake. This dark, rich layer will provide the perfect backdrop for our pink sprinkle design, creating a sophisticated contrast.
5. Decorate with Pink Circles
Now for the artistic flourish! With the brown frosting as your canvas, take your pink circular sprinkles. You can arrange them in a variety of patterns to mimic a logo. A simple yet effective approach is to create a border around the edge of the top of the cake, or perhaps a central design. You might even spell out an initial or create a stylized symbol using the sprinkles. The key is to apply them while the frosting is still soft enough for them to adhere securely. This step truly brings the ‘logo’ concept to life, adding texture and a vibrant pop of color.
6. Add a Shimmering Finish
To give your cake that extra touch of professionalism and allure, it’s time for the edible glitter. Holding the glitter container a few inches above the cake, lightly dust the entire frosted and sprinkled surface. The edible gold or silver glitter will catch the light, providing a subtle shimmer that makes the cake look incredibly special and refined. This final touch is like the gleam on a perfectly crafted piece of jewelry, elevating your edible emblem to a truly stylish creation.
Pro Tips for Perfection
Achieving a truly professional-looking cake, even from a mix, involves a few expert insights that can significantly elevate your results. These are the little tricks I’ve learned through countless hours of meal planning and culinary experimentation, ensuring that every creation is as exceptional as it is intended to be.
- Level Your Cake: For a perfectly flat top, which is essential for a clean ‘logo’ look, once your cake is fully cooled, use a serrated knife to carefully level off any domed top. This creates an even surface for frosting and decorating, ensuring your design lays flat and looks polished.
- Crumb Coat First: If you’re using a homemade frosting or want an extra-smooth finish, apply a thin layer of brown frosting to the cake and refrigerate it for about 15-20 minutes. This ‘crumb coat’ traps any loose cake crumbs, preventing them from mixing into your final frosting layer. After chilling, apply your second, thicker layer of frosting for a flawlessly smooth surface.
- Chill for Cleaner Decorating: After frosting the entire cake with brown, consider refrigerating it for another 10-15 minutes before applying the sprinkles. A slightly firm frosting surface makes it easier to place sprinkles precisely without smudging the base layer, giving you greater control over your ‘logo’ design.
- Sprinkle Application Precision: When applying sprinkles, consider using tweezers for intricate patterns or a small stencil for uniform shapes. For wider coverage, gently press a small piece of parchment paper onto the cake after sprinkling to ensure they adhere well, then carefully peel it back. This technique ensures your pink circles stay exactly where you want them, contributing to the overall crispness of your edible logo.
Variations & Substitutions: Unleash Your Creativity
The beauty of culinary art, much like the versatility I seek in my meal plans, lies in its adaptability. This pink and brown ‘logo’ cake is a fantastic starting point, but don’t hesitate to personalize it further. Think of these suggestions as pathways to new discoveries, transforming a simple concept into a reflection of your unique taste and style. Each modification offers an opportunity to explore new flavors and aesthetics, making the experience truly your own.
- Color Palette Swaps: While pink and brown are chic, consider other combinations! A vibrant cute Hello Kitty cake might inspire you to use red and white for a bolder statement, or perhaps an elegant lavender and cream for a sophisticated touch. Blue and white could evoke a serene, modern vibe. The possibilities are endless when you think about how different colors interact to create a distinct visual identity.
- Flavor Adventures: Instead of a pink cake mix, what about a red velvet base with cream cheese frosting for a classic, rich flavor? Or a lemon cake with raspberry frosting for a tangy, fruity twist? You could even infuse your chocolate frosting with a hint of espresso or a drop of peppermint extract for an unexpected depth of flavor. The interior flavor can be just as much a part of your ‘brand’ as the exterior design.
- Texture Enhancements: Beyond sprinkles, think about adding other textural elements. Crushed nuts or toasted coconut could provide a rustic edge to the brown frosting. Small edible pearls could add a refined, elegant touch. For a truly decadent experience, consider incorporating mini chocolate chips into your cake batter, creating pockets of melty goodness.
- Beyond Circular Sprinkles: While circular sprinkles reinforce the ‘logo’ concept, don’t limit yourself! Small edible flowers could transform the cake into something reminiscent of beautiful blooming cakes. You could use different shaped sprinkles to create a playful pattern, or even finely chopped epic candy-covered wedding cakes inspired candy pieces for a more whimsical approach. The choice of decorative elements can dramatically alter the cake’s personality.
- Edible Imagery: For an even more precise ‘logo’ effect, consider using edible wafer paper printed with your actual logo or a custom design. This can be carefully placed on top of the frosting for a truly professional and personalized finish. This technique offers unparalleled precision and a truly bespoke presentation.
- Accompaniments: Think about what other delightful treats could complement your cake. A plate of perfectly golden bakery-style chocolate chip cookies alongside the cake could offer a contrasting texture and another layer of deliciousness to your presentation. Or perhaps a vibrant fruit platter to balance the richness.
Frequently Asked Questions
Final Thoughts: Your Culinary Signature Awaits
There’s something incredibly satisfying about transforming simple ingredients into a creation that not only tastes wonderful but also captivates the eye. This Pink Brown Cute Circle Cake is more than just a dessert; it’s a testament to the power of thoughtful planning and creative execution in the kitchen. It exemplifies my philosophy that every meal, every baked good, every culinary project is an opportunity for expression and an invitation to explore new dimensions of flavor and design. The process of making this cake, from envisioning its ‘logo’ aesthetic to applying the final shimmering dust, is a rewarding journey that culminates in a truly distinctive edible art piece.
Whether you’re aiming to craft a signature dessert for your burgeoning bakery, create a memorable treat for a special event, or simply indulge your artistic side in the kitchen, this recipe offers a fantastic blueprint. It encourages you to think beyond the ordinary, to see the potential in every ingredient, and to approach baking with an inspired, imaginative spirit. The visual appeal of this cake is undeniable, and the satisfaction of presenting something so meticulously crafted is immense.
So, I wholeheartedly encourage you to try this recipe. Unleash your inner culinary designer and put your own spin on this elegant concept. Experiment with colors, explore different decorative elements, and make this cake truly your own. Share your creations, your adaptations, and your culinary adventures with the world. Let this Pink Brown Cute Circle Cake be a symbol of your prowess in the kitchen, a delicious embodiment of your personal brand, and a reminder that planned deliciousness is always within reach. Happy baking, and may your kitchen always be a place of vibrant creation and exciting discovery!
”
}
Eaghstzxqps Pink Brown Cute Circle Cake And Dessert Logo
Ingredients
Method
- Preheat oven and prepare a round baking pan according to pink cake mix instructions. Lightly spray with non-stick baking spray.
- In a large bowl, combine the pink cake mix with water, oil, and eggs as directed on the box. Mix until the batter is smooth.
- Pour the prepared pink batter evenly into the round baking pan.
- Bake according to package directions, or until a toothpick inserted into the center of the cake comes out clean. Let the cake cool completely on a wire rack.
- Once the cake is fully cooled, spread the chocolate or brown frosting evenly over the top and sides of the round cake.
- Decorate the frosted cake with pink circular sprinkles, arranging them in a cute pattern or design.
- Lightly dust the entire cake with edible gold or silver glitter to give it a 'logo' sparkle and a finished look.
Notes
Loved this recipe? Save it to your favorite Pinterest board so you can easily find it later! ✨