As a busy professional and a parent of two energetic children, my kitchen used to be a vortex of chaos, especially around meal times. The constant stress of figuring out “what’s for dinner” often led to last-minute takeout, wasted groceries, and a strained budget. Over the past decade, I made a conscious decision to reclaim my kitchen and my peace of mind, meticulously developing a systematic approach to meal planning that transformed not just our eating habits, but my entire outlook on managing household tasks. This methodical approach, which focuses on maximizing nutrition, minimizing grocery trips, and making the most of every ingredient, has become my superpower.
This same organized mindset, honed through years of perfecting freezer-friendly meals and smart batch cooking, is precisely what I bring to larger, more intricate culinary projects. It’s about breaking down an ambitious vision into manageable, actionable steps, ensuring that even something as grand as a wedding cake doesn’t become a source of anxiety. The goal is always to empower you to take control, reduce stress, and achieve impressive results with confidence. Today, we’re applying these principles to create show-stopping candy-covered wedding cakes – designs that are not only visually spectacular but also surprisingly achievable with the right strategy.
Forget the notion that grandeur requires endless hours of professional training or an unlimited budget. My method is designed to guide you through crafting efficient, budget-conscious, and truly nourishing culinary experiences, and that extends even to your most special occasions. Let’s tackle these impressive edible centerpieces with the same practical, organized approach that has brought calm and order to my own busy life.
Crafting Memorable Edible Masterpieces with Calm and Confidence
When my journey into structured kitchen management began, it wasn’t about baking elaborate cakes, but rather about streamlining weekly meals. However, the foundational principles I established – meticulous planning, efficient resource allocation, and a focus on execution – proved universally applicable. I learned that having a clear vision, a detailed ingredient list, and a step-by-step plan could transform even the most daunting culinary tasks into enjoyable, achievable projects. This systematic approach is particularly critical when you’re aiming to create something as significant as a wedding cake, where the stakes are higher and the desire for perfection is paramount.
For years, I found myself stressed by the idea of creating large-scale desserts, often resorting to simpler options or outsourcing. But as I gained confidence in my planning abilities, I realized that the same strategies I used to manage a week’s worth of diverse family dinners could be scaled up. It’s about building a robust framework that allows for creative expression without descending into disarray. This means understanding your tools, knowing your ingredients, and mapping out every phase of the process, from the initial concept to the final, dazzling presentation. It’s not just about baking; it’s about strategic project management in the kitchen.
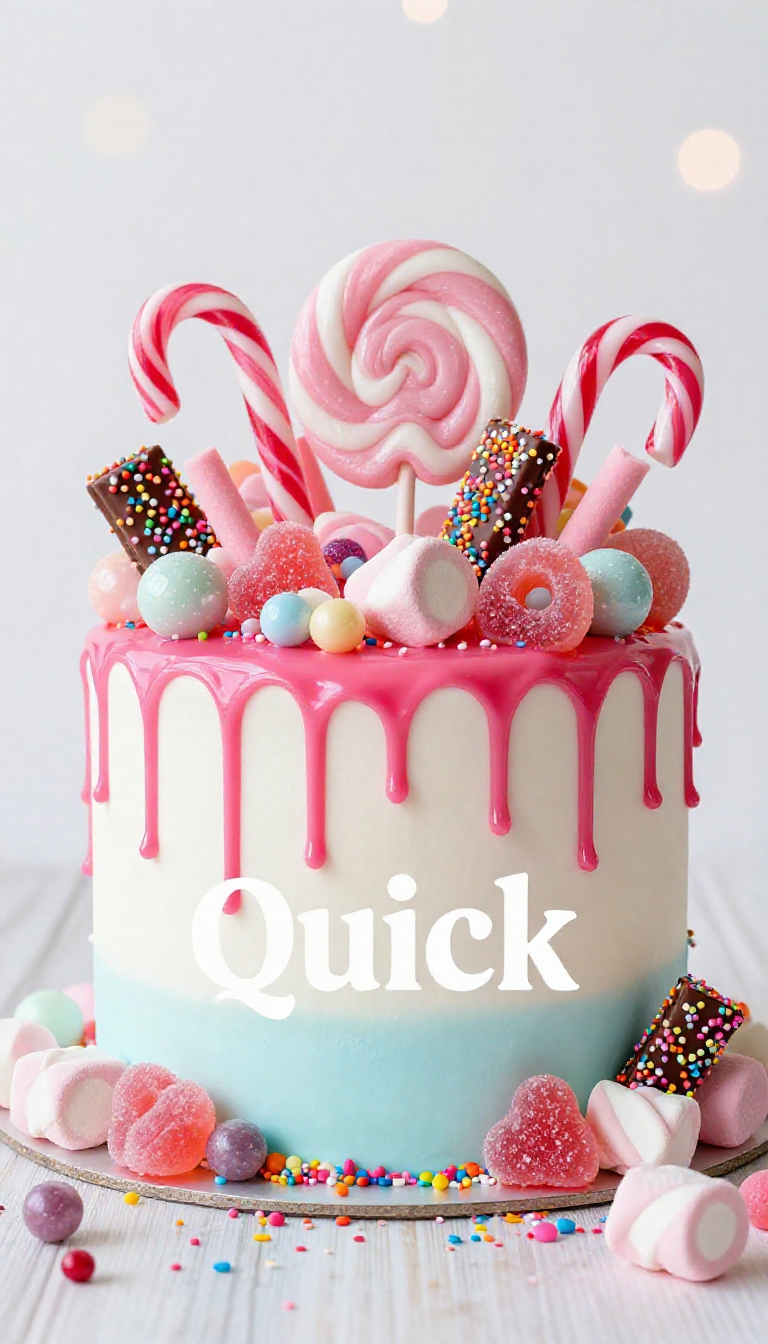
The beauty of a candy-covered wedding cake lies in its ability to deliver immense visual impact with a relatively straightforward decorating process, especially when compared to intricate fondant work or delicate piping. It’s a brilliant way to personalize a significant occasion while maintaining control over your budget and schedule. My approach will guide you to leverage readily available candies and smart assembly techniques, ensuring that your final creation is not only stunning but also a testament to efficient planning and execution. We’re going to make this an empowering, rather than overwhelming, experience, proving that impressive results are within reach for anyone armed with a solid plan.
Table of Contents
- Strategic Sweetness: The Case for Candy-Covered Wedding Cakes
- Your Candy Palette: Essential Edible Elements
- Assembling Your Edible Art: A Practical Guide
- Olivia’s Expert Hacks for a Flawless Finish
- Tailoring Your Treat: Creative Adaptations
- Your Questions Answered: Navigating Candy Cake Creation
- Your Masterpiece Awaits: A Sweet Conclusion
Strategic Sweetness: The Case for Candy-Covered Wedding Cakes
Choosing a candy-covered wedding cake isn’t merely a whimsical decision; it’s a practical and impactful one, aligning perfectly with principles of efficient event planning and budget consciousness. This distinctive style offers a refreshing alternative to traditional designs, providing a canvas for immense creativity while often simplifying the execution process. For those seeking to create a memorable centerpiece without the intensive labor or specialized skills often required for elaborate frosting techniques, this approach stands out as a remarkably smart choice.
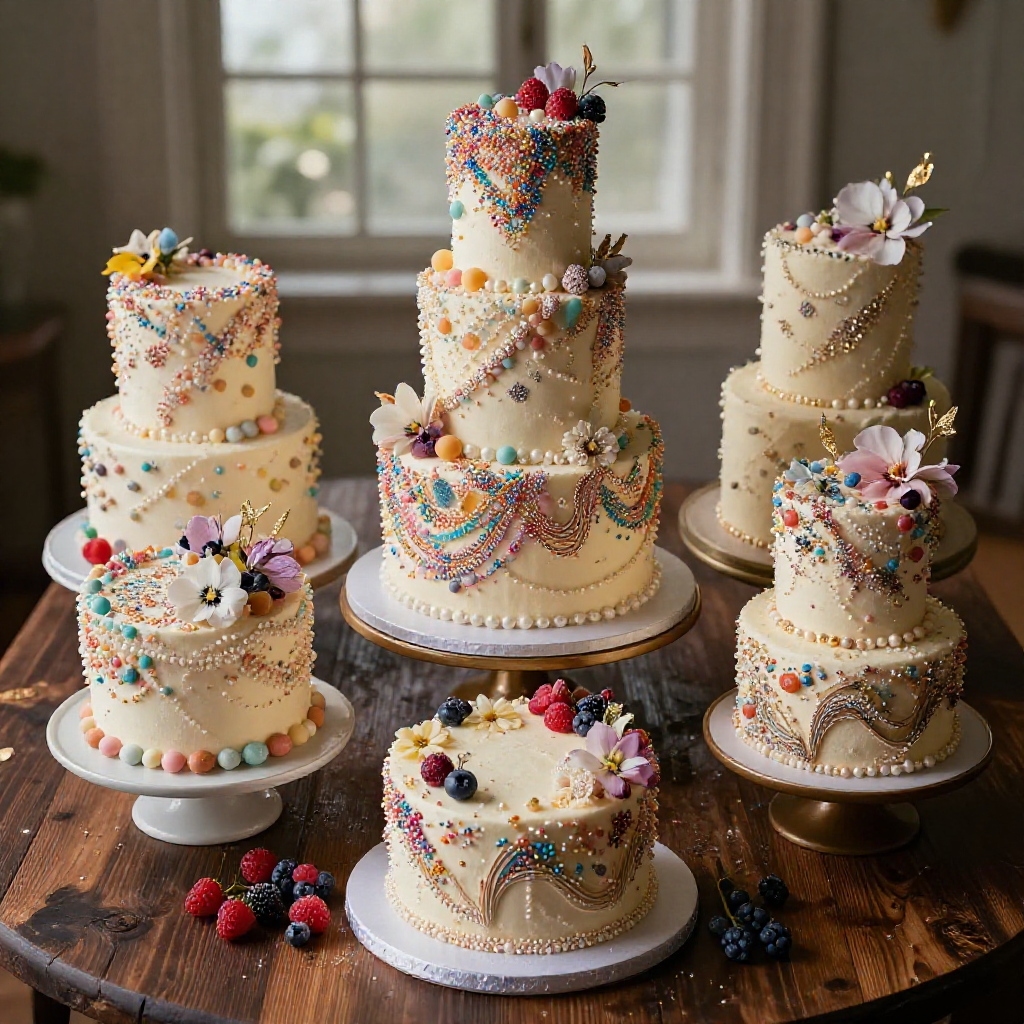
The visual appeal of these cakes is undeniable, making them a fantastic focal point for any reception. The sheer variety of colors, shapes, and textures available in the candy aisle allows for limitless customization, ensuring the cake perfectly matches the wedding theme or personal preferences. Whether you envision a vibrant, playful display or a more sophisticated, monochromatic design, candies offer the flexibility to achieve diverse aesthetic goals. This adaptability makes them a versatile option for various wedding styles, from whimsical garden parties to modern, chic affairs.
Furthermore, from a logistical standpoint, candy-covered cakes present several advantages. They can be less prone to minor imperfections that might be obvious on a smooth fondant surface, as the candies naturally create a textured, forgiving facade. This can reduce pressure during assembly, particularly for those undertaking a DIY project. Additionally, depending on the chosen candies, these cakes can be surprisingly robust, making transportation and display less precarious than some more delicate dessert options. It’s about achieving maximum impact with a pragmatic approach.
- Unparalleled Visual Impact with Personalization: Candy-covered cakes offer an extraordinary opportunity for personalization, allowing couples to incorporate their favorite treats, match wedding colors precisely, or even tell a story through a curated selection of confections. The vibrant hues and diverse textures of candies create an immediate “wow” factor, making the cake an unforgettable element of the reception and a prime photo opportunity.
- Budget-Friendly Elegance: Compared to highly intricate custom fondant work or elaborate sugar flowers, sourcing a variety of bulk candies can often be a more economical choice. This approach allows for a lavish, high-end appearance without incurring the premium costs associated with highly specialized confectionary artistry, making it an excellent option for managing wedding expenses efficiently.
- Accessible for DIY & Creative Control: One of the most significant advantages is the relative ease of assembly. While baking the cake itself requires some skill (perhaps you’re using a trusted recipe like the ultimate chocolate cake for your base), the decorating process primarily involves strategic placement and adhesion of candies. This makes it a fantastic project for a creative couple or a dedicated friend/family member, offering immense creative control over the final product without needing years of professional decorating experience.
Your Candy Palette: Essential Edible Elements
The foundation of any spectacular candy-covered wedding cake lies in a well-curated selection of edible elements. Think of these not just as individual treats, but as artistic components—each with its own color, texture, and structural property. A strategic mix will ensure your cake is not only visually dynamic but also offers an interesting array of flavors and mouthfeels. It’s about selecting a diverse palette that contributes to the overall aesthetic and structural integrity of your design.
When approaching this selection, consider both the primary decorative elements that will cover large surfaces and the smaller, more intricate pieces that will add detail and flair. Durability is also a factor; some candies hold up better than others, especially in varying temperatures. I always recommend doing a small test if you’re unsure how a particular candy will react when adhered or exposed for extended periods. This foresight is part of the methodical planning that ensures a successful outcome.
Below is a comprehensive list of candies and confections that are excellent candidates for your wedding cake project. Remember, the quantity you’ll need will depend heavily on the size of your cake tiers and the density of your chosen design. It’s always pragmatic to purchase a bit more than you anticipate, allowing for breakage, last-minute design changes, or simply indulging in a few samples during the creative process!
- Jelly Beans: Offer a vibrant array of colors and a smooth, consistent shape. Excellent for creating colorful patterns or filling smaller gaps.
- Rock Candy: Available in crystalized sticks or chunks, providing striking texture and sparkle. Clear rock candy can add a sophisticated, icy effect.
- Space Fizzers: Small, effervescent candies that can add a playful, fizzy dimension and a unique textural contrast.
- Liquorice: Can be used for bold lines, geometric patterns, or chopped for textural accents. Braided metallic liquorice offers an elegant, decorative touch.
- Marshmallows: Soft, fluffy, and versatile. Can be used whole, cut, or even toasted lightly for a different effect.
- Chocolate Bars: Can be broken into shards, grated, or melted and drizzled. White chocolate bark adds a contrasting color and a creamy texture.
- Pink Mints: Provide a delicate color and a refreshing flavor, ideal for subtle accents or a pastel theme.
- Doughnuts: Mini doughnuts or regular-sized ones can be stacked on top or used as whimsical toppers for tiers.
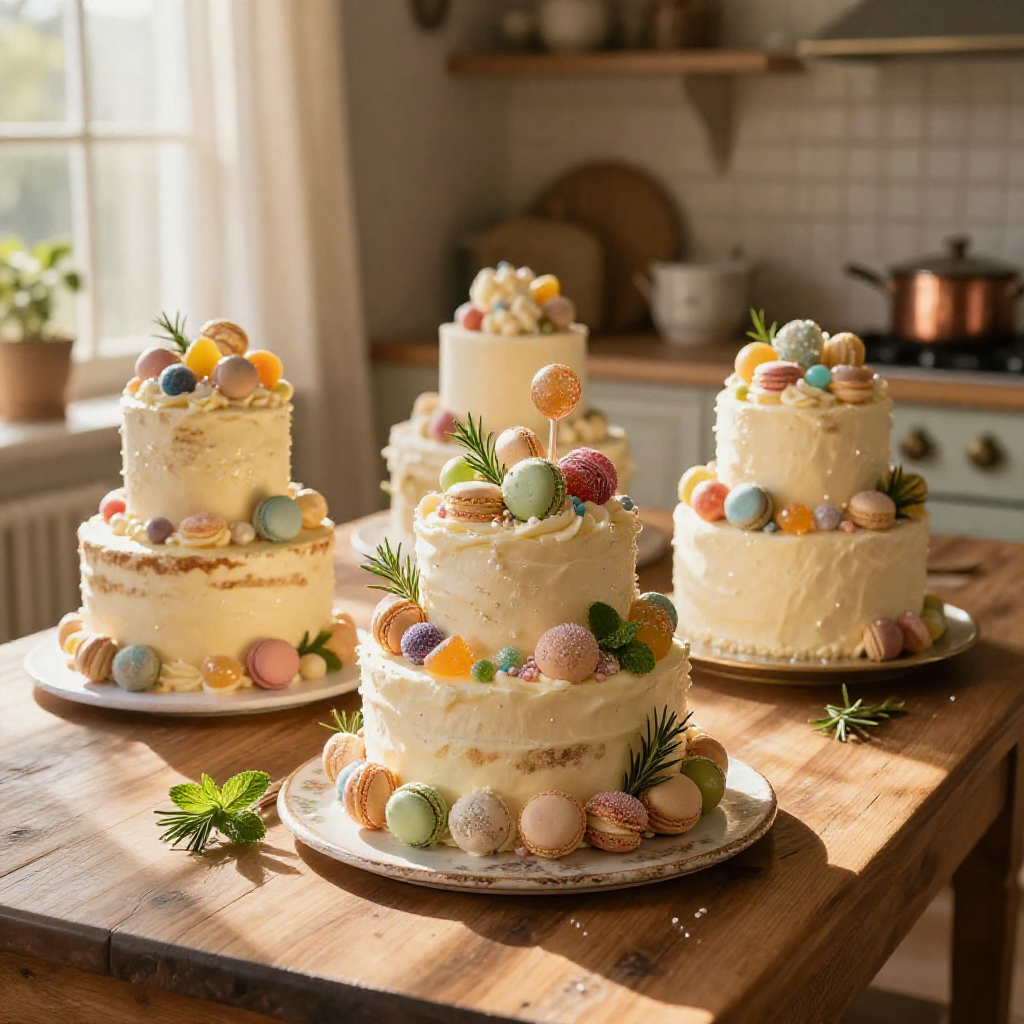
- Macarons: Elegant and delicate, offering sophisticated colors and textures. Perfect for adding a touch of gourmet flair.
- Chocolate Covered Pretzels: Provide a wonderful salty-sweet contrast and a satisfying crunch. Their stick-like shape is great for adding height or radiating patterns.
- Pocky: Thin, biscuit sticks coated in chocolate or other flavors. Excellent for creating radiating patterns, fences, or adding delicate height.
- Lollipops: Available in various sizes and colors, they can be used as bold toppers or integrated into the side design, particularly effective for modern or playful themes.
- Gum Balls: Perfect for creating polka-dot patterns, vibrant borders, or filling spaces with uniform, glossy spheres.
- A Cupcake: A single, decorated cupcake can serve as a whimsical, individual topper, especially if it complements the cake’s theme.
- Jellies / Sweeties: A general term for various gummy candies, offering translucency, chewiness, and a spectrum of bright colors.
- A Mini Cone: Can be inverted and filled with smaller candies, or used as a structural base for a tiny, edible tower on the cake.
Assembling Your Edible Art: A Practical Guide
Creating a candy-covered wedding cake, while visually impressive, is a process that benefits immensely from methodical planning and a structured approach. Think of it less as spontaneous artistic expression and more as a carefully orchestrated construction project. The goal here is efficiency and precision, ensuring each candy finds its place to contribute to a cohesive, stunning design. Remember, the foundation of any great project is in the preparation.
1. The Foundation: Preparing Your Cake Base
Begin with a fully baked, cooled, and crumb-coated cake. For multi-tiered cakes, ensure each tier is properly dowelled and stacked for stability. Your cake should be firm and well-chilled, as this makes handling much easier. A smooth, even frosting layer (such as buttercream or ganache) beneath the candies is crucial for adhesion. This base layer doesn’t need to be perfectly smooth if it’s going to be entirely covered, but consistency is key for the candies to stick evenly.
2. The Adhesive: Choosing Your “Glue”
The choice of adhesive is paramount. Royal icing offers a strong, quick-setting bond, ideal for heavier candies or those needing firm placement. Melted chocolate (white or dark, tempered or simply melted with a bit of shortening for ease of use) also works exceptionally well, providing a sturdy hold and often complementing the candy flavors. For lighter candies or quick fixes, a dab of stiff buttercream can suffice. Prepare your chosen adhesive in advance and have it ready in piping bags or small bowls for easy application.
3. Strategic Candy Placement: Starting with Your Vision
Before you begin adhering candies, have a clear design plan. Will you cover the cake entirely, create stripes, patterns, or a gradient? Arrange a small selection of your chosen candies around your workspace to visualize the color and texture combinations. Start with larger, foundational candies or those that define a primary pattern. For instance, if you’re creating vertical stripes with unique themed cakes elements or a specific design, map out your starting points. Working from the bottom up on each tier can often be the most stable approach, allowing gravity to assist rather than hinder.
4. Layering and Dimension: Building Visual Interest
Once your primary candy layer is in place, begin adding secondary and tertiary elements. This is where you introduce different textures and shapes. For example, after a base of jelly beans, you might add rows of chocolate-covered pretzels for linear contrast, or cluster pink mints for a softer touch. Incorporate items like macarons or doughnuts strategically to break up the surface and add architectural interest. Don’t hesitate to use varying sizes of the same candy to create depth.
5. The Art of Adhesion: Precision and Patience
Apply adhesive directly to the back of each candy or to the cake surface where the candy will be placed. For delicate items like Pocky, a thin line of melted chocolate along one side works best. For larger, flat candies like chocolate bar shards, a generous dollop of royal icing will ensure a secure bond. Hold each candy in place for a few seconds until it feels set. This step requires patience, especially if you’re working with many small pieces. Work in small sections to prevent your adhesive from drying out prematurely.
6. Toppers and Embellishments: The Grand Finale
Once the main body of the cake is covered, turn your attention to the top tier and any specific toppers. This is an opportunity to really showcase your creativity. A cluster of lollipops, a stack of mini doughnuts, or even a beautifully adorned cupcake can serve as a striking focal point. Consider using clear rock candy to create a crystalline crown or braided metallic liquorice for a sophisticated swirl. If you’re thinking of adding fresh elements like flowers, be sure to use food-safe barriers between the stems and the cake, similar to techniques used for beautiful blooming cakes.
7. The Finishing Touches: Gaps and Gloss
Step back and examine your cake from all angles. Are there any small gaps that need filling? Tiny candies like gum balls or space fizzers are perfect for this. Sometimes, a light dusting of edible glitter or a careful drizzle of melted white chocolate bark can add an extra layer of sparkle and refinement. This final inspection ensures a polished, professional appearance, reflecting the careful planning and execution you’ve invested in your edible masterpiece.
Olivia’s Expert Hacks for a Flawless Finish
Creating a stunning candy-covered wedding cake doesn’t have to be an overwhelming endeavor. With a few strategic tips and a methodical approach, you can achieve a professional-looking result without unnecessary stress. These hacks are born from years of streamlined kitchen management and tackling ambitious projects with efficiency in mind. They’re designed to empower you to approach this task with confidence and control.
The key to success often lies in foresight and preparation, minimizing potential issues before they arise. From understanding your materials to optimizing your workflow, these practical insights will guide you through the process, ensuring your focus remains on execution rather than troubleshooting. Let’s make this project as smooth and satisfying as possible.
- Pre-Sorting is Paramount: Before you even think about applying candy to the cake, take the time to unwrap, sort, and organize all your candies. Separate by color, size, and type into small bowls or containers. This ‘mise en place’ for your candies saves immense time during the actual decorating process, preventing frantic searching for the right piece and allowing for a smoother, more efficient workflow. It also helps you visualize your palette and ensure you have enough of each element.
- Chill Your Cake Religiously: A cold, firm cake is your best friend. After crumb coating and applying your base frosting layer, chill your cake thoroughly in the refrigerator for at least 30-60 minutes, or even longer for larger tiers. This firm foundation prevents the cake from shifting, helps the frosting set, and makes it significantly easier to handle and apply candies without damaging the cake structure. A cold surface also gives your adhesive a better chance to set quickly.
- Test Your Adhesives: Not all candies adhere equally well to all adhesives. Before committing to your entire cake, test a few different candies with your chosen ‘glue’ (royal icing, melted chocolate, stiff buttercream) on a small, inconspicuous area or on a practice piece of cake. Observe how quickly it sets and how strong the bond is. This simple step can save you from frustration and potential candy cascades later on.
- Gravity is Your Friend (and Foe): When working on the sides of a tiered cake, always start at the bottom of each tier and work your way up. This allows the candies below to provide a slight ledge or support for the candies above, preventing slippage while the adhesive sets. For heavier candies or delicate placements, consider using small pins (removed before serving, of course!) or propping them temporarily with toothpicks until the adhesive is fully cured.
- Embrace Imperfection (Strategically): While the goal is a flawless finish, sometimes a tiny gap or a slightly misaligned candy can occur. Don’t stress. Keep a stash of very small candies like jelly beans, gum balls, or even sprinkles handy to fill in any tiny imperfections or gaps. These small accents can actually add to the textured, organic appeal of a candy-covered cake, making it look intentionally intricate rather than accidentally flawed.
Tailoring Your Treat: Creative Adaptations
One of the most appealing aspects of designing a candy-covered wedding cake is the incredible flexibility it offers for personalization. This isn’t a one-size-fits-all approach; rather, it’s a framework that invites creative adaptation to perfectly suit any theme, dietary requirement, or aesthetic preference. My meal planning philosophy centers on making recipes work for *your* family and *your* needs, and this principle extends wholeheartedly to special occasion baking. With a little foresight, your candy cake can be as unique as the couple it celebrates.
Consider the overarching theme of the wedding. Is it a vintage affair, a vibrant modern celebration, or something whimsical and rustic? Your candy selection can profoundly influence the cake’s character. For instance, a monochromatic palette using various shades of white or silver candies like clear rock candy, white chocolate bark, and frosted pink mints can exude sophisticated elegance. Conversely, a riot of colors using jelly beans, lollipops, and gum balls creates an undeniably playful and energetic statement. Think about how texture also plays a role—smooth vs. crunchy, glossy vs. matte—to add depth and visual interest.
Beyond aesthetics, dietary needs are increasingly important to consider. While a fully allergen-free candy cake can be challenging, many candies now offer gluten-free, dairy-free, or even sugar-free options. Researching brands and ingredient lists is crucial. For example, some liquorice varieties are gluten-free, and certain jellies or sweeties can be made with plant-based gelling agents. If there are severe allergies, consider designating a separate, smaller cake or a platter of brown butter cookies or other specialized treats to ensure everyone can partake safely. Transparency with guests about ingredients is always the best policy.
Finally, don’t limit your toppings to just candies. Incorporating other edible elements can elevate the design further. Mini doughnuts and macarons offer sophisticated textural variations. Chocolate-covered pretzels and Pocky sticks provide excellent structural elements for height and radiating patterns. For a truly bespoke touch, you might even consider integrating elements that mimic beautiful blooming cakes by creating candy flowers, or using edible glitter to create a shimmering effect. Remember, the cake is a canvas, and your imagination is the only limit.
Your Questions Answered: Navigating Candy Cake Creation
Creating a candy-covered wedding cake often sparks a few practical questions, especially if you’re undertaking such a project for the first time. As someone who’s spent years refining efficient kitchen practices, I understand the need for clear, actionable answers. Here are some of the most common inquiries I encounter, along with my pragmatic advice to ensure your cake-making journey is as smooth as possible.
Having a strong understanding of the logistics—from preparation timelines to safe storage—is just as important as the decorating itself. This section aims to equip you with the knowledge to anticipate challenges and implement effective solutions, allowing you to focus on the creative aspects of your edible masterpiece.
Q: How far in advance can I prepare a candy-covered cake?
A: The cake base itself can often be baked and frozen weeks or even months in advance. For the decorating, it’s best to aim for 2-3 days before the event. This allows ample time for the adhesive to fully set and for any last-minute adjustments. Most candies will hold up well for this duration. However, avoid applying very soft or highly hygroscopic (moisture-absorbing) candies too far in advance, as they might become sticky or lose their texture.
Q: What’s the best way to transport a tiered candy cake?
A: For multi-tiered cakes, I highly recommend transporting them unstacked if possible, especially if the journey is long or bumpy. Stack and finish decorating at the venue. If stacking beforehand is necessary, ensure each tier is properly dowelled and supported. Use a sturdy cake box, and place non-slip mats beneath the cake board. Keep the cake cool during transport, ideally in an air-conditioned vehicle, to prevent candies or frosting from melting or shifting. For different cake bases, such as those made with cheesecake batter ingredients, ensure they are thoroughly chilled and firm.
Q: Can I use different types of cake bases for a candy-covered cake?
A: Absolutely! While sturdy butter cakes or dense sponge cakes are traditional choices, a candy-covered exterior can work with various bases. The key is a firm, stable frosting layer to adhere the candies. You could use a rich chocolate cake, a delicate vanilla, or even a lemon poppy seed. For a lighter touch, you might even consider using faux cake tiers (styrofoam) for some layers, especially if you’re aiming for a very tall cake but don’t need all tiers to be edible. This can also help manage costs and weight.
Q: How do I prevent candies from falling off the cake?
A: The most critical factors are a strong adhesive and proper application. Use royal icing or melted, tempered chocolate for the most secure bond. Apply enough adhesive to cover the back of the candy, but not so much that it oozes out excessively. Press each candy firmly but gently into the frosting, holding for a few seconds until it feels secure. Ensure your cake base is cold and firm, as this provides a better surface for adhesion. Avoid humid environments, which can cause some candies to sweat or adhesives to weaken.
Your Masterpiece Awaits: A Sweet Conclusion
Creating a candy-covered wedding cake is more than just a baking project; it’s an exercise in organized creativity, a testament to what can be achieved with a clear plan and a practical approach. Throughout this guide, my aim has been to demystify the process, breaking down what might seem like an intimidating task into manageable, actionable steps. From selecting your vibrant candy palette to mastering adhesion techniques, every tip and hack shared is designed to empower you, reducing potential stress and building your confidence.
Remember, the true essence of a remarkable wedding cake lies not just in its perfection, but in the thought, effort, and care that goes into its creation. A candy-covered cake offers an unparalleled opportunity to infuse a deeply personal touch, reflecting the unique personalities and tastes of the couple. It allows for a burst of color, a playful texture, and an undeniable visual statement that will be remembered long after the last slice is served.
I genuinely hope this comprehensive guide inspires you to take on this rewarding project. The satisfaction of presenting a stunning, self-made centerpiece is immense, and with the systematic strategies we’ve discussed, it’s entirely within your grasp. Don’t hesitate to experiment with different candy combinations and embrace your own creative vision. Your kitchen is a place for innovation and achievement, and this cake is an excellent canvas to prove it.
Now, go forth and create something truly spectacular. I can’t wait to see the incredible candy-covered wedding cakes you bring to life!
Epic Candy-Covered Wedding Cake
Ingredients
Method
- Prepare your multi-tiered cake with desired frosting, ensuring a smooth and stable base for decorations.
- Apply a rainbow drip if desired, allowing it to set slightly before adding solid decorations.
- Arrange larger candies like doughnuts, macarons, and oversized lollipops as focal points on each tier.
- Fill in gaps with smaller candies such as jelly beans, M&Ms, Skittles, and crushed rock candy, creating a vibrant mosaic.
- Add decorative elements like chocolate shards, edible flower bark, and candy canes for texture and visual interest.
- Finish with a generous sprinkle of sprinkles and any remaining delicate candies or bows for a final flourish.
Notes
Loved this recipe? Save it to your favorite Pinterest board so you can easily find it later! ✨