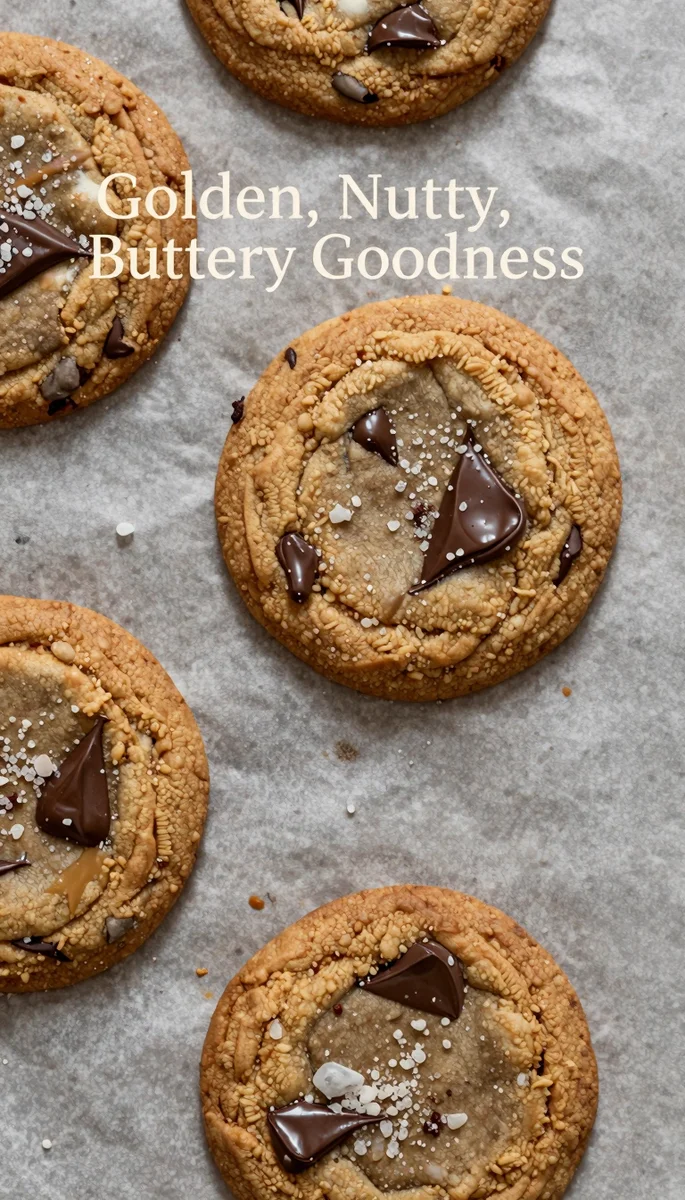
Ultimate Brown Butter Chocolate Chip Cookies Recipe
Elevating Your Weeknight Treats with a Simple Twist
As a working mom of two from the Midwest, I know firsthand how chaotic weeknights can become. Between school pickups, homework battles, and getting dinner on the table, finding time for anything else often feels impossible. For years, my family and I relied heavily on takeout, and while convenient, it certainly wasn’t sustainable for our budget or our energy levels. That’s when I truly embraced the absolute magic of meal prepping. Now, a couple of dedicated hours every Sunday transforms our week, keeping our fridge stocked and our evenings open for what truly matters – whether that’s a board game with the kids or simply reading a book without interruption.
But meal prepping isn’t just about savory meals; it extends to making sure we have wholesome, homemade snacks and desserts on hand too. Because, let’s be honest, there’s nothing quite like a homemade treat to round out a busy day or make a regular Tuesday feel a little more special. Today, I’m sharing a recipe that has become a staple in our home, a true game-changer that takes a classic and elevates it to something extraordinary with one simple step: brown butter. These aren’t just any cookies; these are the cookies that will have everyone asking for the recipe, and the best part? They are incredibly efficient to make, especially when you master the process.
This recipe for Brown Butter Chocolate Chip Cookies is a prime example of how a small adjustment can yield remarkable results. It’s a testament to the idea that even with a packed schedule, you can create something truly spectacular without adding extra stress. The nutty aroma and richer flavor profile of brown butter transform the familiar chocolate chip cookie into a sophisticated yet utterly approachable dessert. It’s realistic, budget-friendly, and perfectly suited for batch-cooking, ensuring you have a stash ready for unexpected guests or just a quiet evening indulgence. Let’s get organized and bake some amazing cookies!
Table of Contents
- Elevating Your Weeknight Treats with a Simple Twist
- Why This Recipe Works
- Ingredients You’ll Need
- Step-by-Step Instructions
- Pro Tips for Cookie Perfection
- Variations & Substitutions
- Frequently Asked Questions About Brown Butter Cookies
- Final Thoughts on Your Next Batch
Why This Recipe Works
This Brown Butter Chocolate Chip Cookie recipe isn’t just another cookie recipe; it’s a meticulously designed approach to achieve exceptional results with minimal fuss. From the careful selection of ingredients to the precise methodology, every element contributes to a cookie that is both perfectly structured and bursting with flavor. I’ve refined this process to ensure that even on your busiest days, you can execute it flawlessly, making it a stellar addition to your collection of go-to desserts.
One of the core reasons this recipe stands out is its capacity for advanced preparation. You can prepare the brown butter ahead of time, allowing it to cool and firm up slightly, which is a fantastic strategy for efficient meal prepping. Furthermore, the cookie dough itself benefits immensely from refrigeration, making it an ideal candidate for batch-cooking. Imagine having perfectly portioned dough ready in your freezer, waiting to be baked at a moment’s notice. This approach truly embodies the stress-free ethos I strive for in my kitchen.
- Unparalleled Flavor Depth: Brown butter isn’t just melted butter; it’s butter that has been cooked until the milk solids toast, imparting a profound nutty, caramel-like essence that elevates the entire cookie. This single step transforms a standard chocolate chip cookie into something far more complex and memorable.
- Chewy and Gooey Texture: The precise ratio of sugars, the inclusion of brown butter, and the recommended chilling time work in harmony to create a cookie that is perfectly chewy at the edges with a wonderfully soft, gooey center. Achieving this balance is key to a truly satisfying chocolate chip cookie experience.
- Efficient and Organized Baking: This recipe is structured with efficiency in mind. From the initial browning of butter to the optional chilling of the dough, each step is clear and contributes to an organized baking process. It’s designed to fit into a busy schedule, proving that exceptional baking doesn’t require an entire afternoon.
Ingredients You’ll Need
Gathering your ingredients systematically is the first step to any successful baking endeavor, especially when you’re aiming for an organized kitchen and a stress-free process. For these remarkable brown butter chocolate chip cookies, quality ingredients make a significant difference in the final outcome. I always recommend using fresh, good-quality butter and eggs, as they form the foundation of these chewy, nutty treats.
Having everything measured out and ready before you begin, a practice often called ‘mise en place,’ ensures a smooth workflow. This is particularly useful when you’re batch-cooking or trying to fit baking into a tight schedule. Make sure your butter is unsalted, as this gives you precise control over the salt content in your cookies. The combination of brown and granulated sugar is critical for both texture and flavor, so stick to the specified amounts for that perfect balance.
- 1 cup (2 sticks) unsalted butter: This is the star ingredient that we’ll transform into brown butter, providing depth and a nutty undertone.
- 2 cups all-purpose flour: The structural backbone of our cookies, providing the right chewiness.
- 1 teaspoon baking soda: Our leavening agent, ensuring a proper rise and soft texture.
- 1 teaspoon salt: Crucial for balancing the sweetness and enhancing all the flavors.
- 3/4 cup packed light brown sugar: Contributes to the chewy texture and a subtle caramel-like flavor.
- 1/2 cup granulated sugar: Provides crispness around the edges and overall sweetness.
- 2 large eggs: Binds the ingredients together and adds richness.
- 1 teaspoon vanilla extract: A classic flavor enhancer that complements the brown butter beautifully.
- 1 1/2 cups chocolate chips (milk, semi-sweet, or a mix): The quintessential addition; choose your favorite or mix them for varied texture and flavor.
Step-by-Step Instructions
Executing this recipe requires a methodical approach, much like any efficient meal prep plan. By following these clear, step-by-step instructions, you’ll achieve perfectly baked brown butter chocolate chip cookies every single time. Take your time with the browning of the butter; it’s the most critical step for developing that signature nutty flavor profile.
Remember, baking is a science, and precision leads to predictable and delicious results. Have all your ingredients measured and laid out before you begin. This will streamline the process and minimize any potential for errors, especially if you’re working against the clock. The chilling step, while optional for some, is highly recommended for superior flavor and texture, so try to factor it into your schedule.
- Brown the Butter: In a light-colored saucepan (this helps you see the browning process), melt the 1 cup of unsalted butter over medium heat. Continue cooking, stirring occasionally, for 5-8 minutes. The butter will foam, then sizzle, and eventually, the milk solids at the bottom will turn amber and smell distinctly nutty. This is the crucial stage; watch carefully to prevent burning. Immediately pour the brown butter into a heatproof bowl to stop the cooking process and let it cool for at least 15-20 minutes, or until it’s no longer hot but still liquid. This cooling period is essential for the butter to properly emulsify with the sugars without scrambling the eggs later.
- Combine Dry Ingredients: While the butter cools, whisk together the 2 cups of all-purpose flour, 1 teaspoon of baking soda, and 1 teaspoon of salt in a medium bowl. Ensure these are thoroughly combined to distribute the leavening evenly throughout the dough. Set this bowl aside.
- Cream Wet Ingredients (Part 1): Once the brown butter has cooled sufficiently, add the 3/4 cup packed light brown sugar and 1/2 cup granulated sugar to the bowl with the brown butter. Whisk vigorously until the sugars are well combined and the mixture is smooth. This step ensures the sugars dissolve properly and contribute to that wonderful chewy texture.
- Cream Wet Ingredients (Part 2): Add the 2 large eggs, one at a time, whisking well after each addition until fully incorporated and the mixture is light and creamy. The emulsification here is important for the cookie’s structure. Stir in the 1 teaspoon of vanilla extract.
- Combine Wet and Dry: Gradually add the dry ingredients to the wet ingredients. Mix on low speed with an electric mixer or by hand until just combined. Be careful not to overmix; overmixing can develop too much gluten, resulting in tough cookies. Stop mixing as soon as no streaks of flour remain.
- Fold in Chocolate Chips: Gently fold in the 1 1/2 cups of chocolate chips until they are evenly distributed throughout the dough. You can use milk, semi-sweet, or a mix of both for varied textures and flavor notes.
- Chill the Dough (Optional but Recommended): Cover the dough with plastic wrap and refrigerate for at least 30 minutes, or ideally, for 2-24 hours. This step is not just about firming up the dough for easier handling; it allows the flavors to meld and hydrate the flour, resulting in a more complex flavor and a chewier, more structured cookie. This is a critical step if you’re aiming for a truly premium cookie, and it’s perfect for a batch-cooking strategy.
- Preheat Oven and Prepare Baking Sheets: When ready to bake, preheat your oven to 375°F (190°C). Line baking sheets with parchment paper or silicone baking mats. This prevents sticking and ensures even baking.
- Scoop and Bake: Scoop rounded tablespoons of dough onto the prepared baking sheets, leaving about 2 inches between cookies to allow for spreading. You can use a cookie scoop for uniform size, which ensures even baking.
- Bake: Bake for 9-12 minutes, or until the edges are golden brown and the centers are still slightly soft. Do not overbake! The cookies will continue to set as they cool on the baking sheet. For a truly amazing experience, try pairing these with a rich chocolate cake for a decadent dessert spread.
- Cool: Let the cookies cool on the baking sheets for 5 minutes before transferring them to a wire rack to cool completely. This allows them to firm up without breaking.
Pro Tips for Cookie Perfection
Achieving consistently spectacular cookies requires attention to detail and a few clever strategies. As someone who relies on efficient systems for meal prepping, I’ve found that these tips not only improve the outcome of your baking but also make the entire process more organized and less stressful. Think of these as your secret weapons for turning a good cookie into an extraordinary one.
These techniques are particularly useful for busy individuals who want to maximize their time in the kitchen without compromising on quality. From ingredient preparation to baking execution, each tip is designed to streamline your efforts and ensure a superior product. Incorporating these into your routine will make baking a breeze and consistently yield fantastic results that are perfect for any occasion, even a simple weeknight treat.
- Don’t Rush the Brown Butter: This is arguably the most important step. Use a light-colored pan so you can easily monitor the browning. Keep the heat at medium and stir constantly. You’re looking for amber-colored bits at the bottom and a nutty aroma. Once it reaches this point, immediately transfer it to a separate bowl to prevent it from burning. Burnt butter will make your cookies bitter. This process might take 5-8 minutes, so be patient.
- Chill Your Dough: While you can bake these without chilling, refrigerating the dough for at least 30 minutes (or even up to 24-48 hours) makes a significant difference. Chilling allows the flour to fully hydrate, the flavors to meld, and the butter to firm up. This results in a chewier cookie with a more developed flavor and less spread during baking. If you’re meal prepping, this is a perfect opportunity to batch-cook dough for later, storing it in an airtight tupperware container.
- Room Temperature Eggs: Always use room temperature eggs. They incorporate more evenly into the batter, creating a smoother, more emulsified dough. If you forget to take them out ahead of time, simply place them in a bowl of warm water for 5-10 minutes.
- Don’t Overmix: Once you add the dry ingredients to the wet, mix only until just combined. Overmixing develops the gluten in the flour, which can lead to tough, dense cookies. A few streaks of flour are fine; they will disappear during baking.
- Use a Cookie Scoop: For uniform cookies that bake evenly, a cookie scoop is invaluable. This also makes the portioning process incredibly efficient, especially when you’re making a big batch. If you’re looking for other cookie ideas, consider trying some special occasion cookies to impress your guests.
Variations & Substitutions
While the classic Brown Butter Chocolate Chip Cookie is a masterpiece on its own, sometimes it’s fun to experiment and tailor a recipe to your specific preferences or what you have on hand. Just like with my weekly meal prep, having adaptable recipes means you’re always prepared, even when ingredients are scarce or you’re craving something a little different. These variations allow you to put your own spin on a truly delicious cookie, maintaining its fundamental structure while exploring new flavor dimensions.
Remember, baking is a creative process within a structured framework. Feel empowered to make these cookies truly your own, whether it’s through swapping out chocolate types or adding entirely new elements. This adaptability makes the recipe incredibly versatile for any occasion, from a simple afternoon snack to a more elaborate dessert spread. For other fun baking ideas, especially for kids, you might also like these fun mummy brownies, which are always a hit.
- Chocolate Variations: Instead of or in addition to standard chocolate chips, try chopped chocolate bars (dark, milk, or white), mini chocolate chips, or even chocolate chunks for different textures and melting qualities. A mix of semi-sweet and dark chocolate can provide a more complex flavor profile.
- Nutty Additions: Fold in 1/2 cup of toasted chopped nuts like pecans, walnuts, or almonds along with the chocolate chips. Toasting them beforehand enhances their flavor significantly. This complements the nutty notes from the brown butter beautifully.
- Spices: A pinch of cinnamon, nutmeg, or even a tiny bit of cayenne pepper can add an unexpected depth to the cookies, especially during cooler months. Start with 1/4 teaspoon and adjust to your preference.
- Flour Substitutions: For a slightly different texture, you could try substituting a small portion of the all-purpose flour (e.g., 1/4 cup) with whole wheat pastry flour, which adds a subtle nuttiness. Gluten-free all-purpose flour blends can also be used, though results may vary slightly.
- Salt Sprinkle: For an extra layer of flavor and visual appeal, sprinkle a little flaky sea salt on top of the cookie dough balls before baking. This enhances the chocolate and caramel notes.
- Coffee Enhancement: A teaspoon of instant espresso powder added to the dry ingredients can intensify the chocolate flavor without making the cookies taste like coffee.
Frequently Asked Questions About Brown Butter Cookies
When you embark on a new recipe, especially one with a unique step like browning butter, it’s natural to have questions. I’ve compiled some of the most common inquiries to help you troubleshoot and ensure your baking experience is as stress-free and successful as possible. Think of this as your practical guide to mastering the art of the brown butter cookie, making it an efficient addition to your meal prep repertoire.
Having these answers at your fingertips will give you the confidence to tackle this recipe, knowing that potential hurdles have already been addressed. My goal is always to provide clear, actionable advice that helps you achieve consistently excellent results, proving that even advanced techniques can be approachable for the home baker. For those who prefer a quicker bake, you can find a recipe for classic chocolate chip cookies that are ready in under 30 minutes.
What if my brown butter burns?
If your brown butter turns dark brown or black and smells burnt, it’s best to discard it and start over. Burnt butter will impart a bitter, unpleasant flavor to your cookies. The key is to use a light-colored pan and watch it carefully, removing it from the heat as soon as it reaches that amber, nutty stage.
Do I really need to chill the dough?
While not strictly mandatory, chilling the dough is highly recommended for the best results. It allows the flour to fully hydrate, preventing a cakey texture, and helps the flavors deepen. More importantly, it firms up the butter, which prevents the cookies from spreading too much in the oven, leading to a thicker, chewier cookie. Even 30 minutes makes a noticeable difference, but an hour or more is ideal for that premium bakery-style texture.
Can I freeze the cookie dough?
Absolutely! Freezing cookie dough is an excellent strategy for batch-cooking and ensuring you always have fresh cookies on hand. Scoop the dough into individual balls and place them on a parchment-lined baking sheet. Freeze until solid, then transfer the frozen dough balls to an airtight freezer bag or tupperware container. They can be stored for up to 3 months. When ready to bake, you can bake them directly from frozen, adding an extra 2-4 minutes to the baking time.
How do I store baked brown butter chocolate chip cookies?
Once completely cooled, store the baked cookies in an airtight container at room temperature for up to 3-4 days. For longer storage, you can freeze baked cookies for up to 2-3 months. Thaw them at room temperature or warm them gently in the oven for a few minutes for that freshly baked experience.
Final Thoughts on Your Next Batch
There you have it – the ultimate guide to crafting Brown Butter Chocolate Chip Cookies that are truly in a league of their own. As a working mom who thrives on efficient systems and budget-friendly solutions, I can confidently say that this recipe delivers on all fronts. It’s a sophisticated take on a classic, yet entirely approachable for any home baker. The nutty depth from the brown butter, combined with the perfectly chewy texture, makes these an absolute standout.
I encourage you to give this recipe a try, perhaps incorporating it into your next meal prep session. Imagine the satisfaction of pulling a tray of these golden-edged, gooey-centered cookies from the oven after a long day, knowing you prepared them with care and efficiency. They are perfect for a special family treat, an impressive offering for guests, or simply a well-deserved indulgence for yourself. This recipe truly embodies the idea that with a little organization and a few strategic steps, you can create something extraordinary without adding any unnecessary stress to your already busy life.
So, gather your ingredients, take your time with that crucial brown butter step, and prepare to elevate your cookie game. I promise, once you experience the difference brown butter makes, you’ll find it hard to go back to the ordinary. Happy baking, and may your tupperware always be stocked with delicious, homemade goodness!

Brown Butter Chocolate Chip Cookies
Ingredients
Method
- Melt butter in a light-colored saucepan over medium heat until amber and nutty. Pour into a heatproof bowl and cool for 15-20 minutes.
- Whisk together flour, baking soda, and salt in a medium bowl. Set aside.
- Once the brown butter has cooled, whisk brown sugar and granulated sugar into the butter until smooth.
- Add eggs one at a time, whisking well after each. Stir in vanilla extract.
- Gradually add dry ingredients to wet, mixing until just combined. Do not overmix.
- Fold in chocolate chips until evenly distributed.
- Cover and refrigerate dough for at least 30 minutes (up to 24 hours) for best results.
- Preheat oven to 375°F (190°C). Line baking sheets with parchment paper.
- Scoop rounded tablespoons of dough onto prepared sheets, leaving 2 inches between cookies.
- Bake for 9-12 minutes, until edges are golden and centers are slightly soft. Do not overbake.
- Cool on baking sheets for 5 minutes, then transfer to a wire rack to cool completely.
Notes
Loved this recipe? Save it to your favorite Pinterest board so you can easily find it later! ✨