
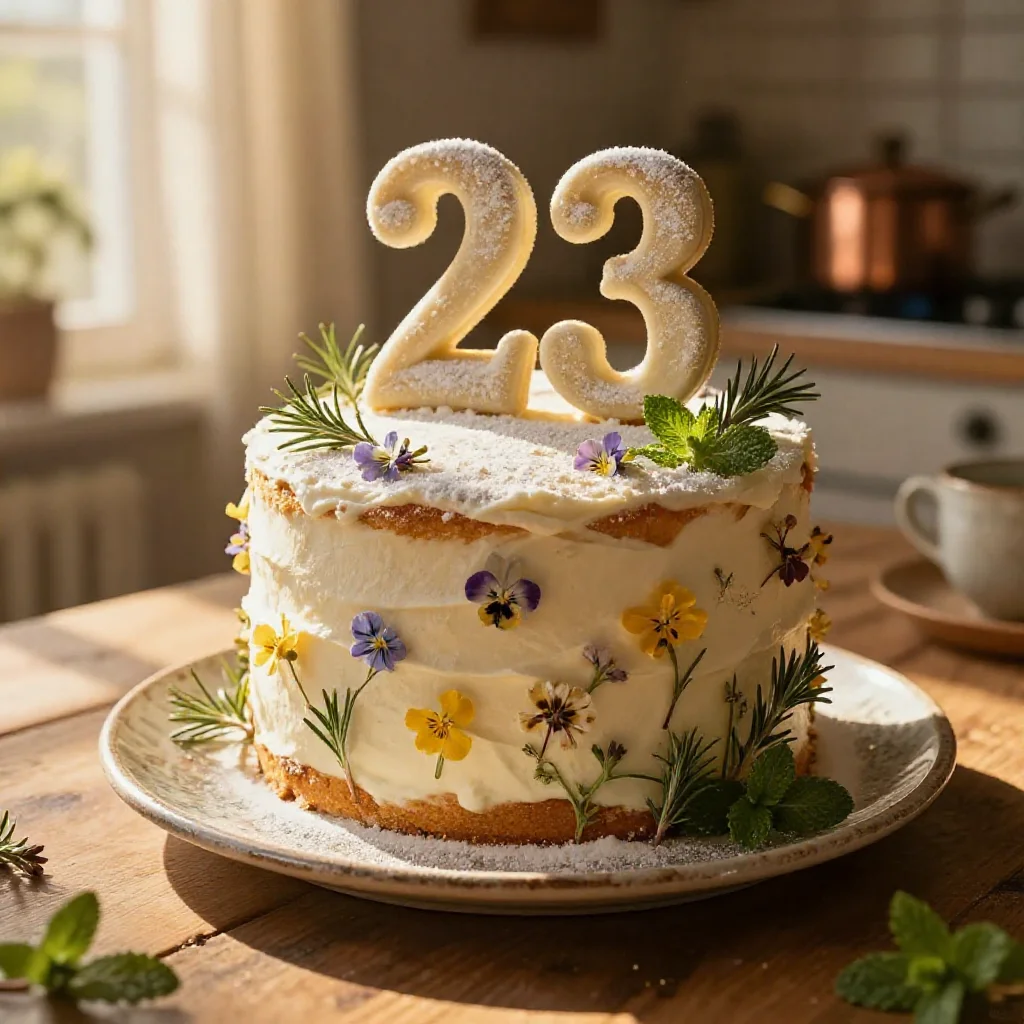
Elegant 23rd Birthday Cake: Recipe for Her Special Day
From Busy Weeks to Beautiful Bakes: Making Time for Milestone Moments
As Olivia, a working mom of two from the Midwest, I know firsthand how demanding life can be. Between managing a full-time job, keeping up with school schedules, and making sure everyone is fed, it used to feel like I was constantly running on empty. We often relied on takeout simply because the thought of adding another task to my evening felt overwhelming. It was a cycle of exhaustion that left me feeling like I was missing out on truly connecting with my family, especially when it came to those significant, once-a-year occasions.
That’s precisely why I became such a proponent of meal prepping. Dedicating a couple of hours every Sunday to chopping, roasting, and organizing ingredients has been an absolute game-changer. It means our weeknights are no longer a mad dash to get dinner on the table. Instead, they become open canvases for what truly matters – helping with homework, reading stories, or simply unwinding together. This structured approach to our weekly meals not only keeps our fridge stocked and our family nourished but also carves out precious time for creating special memories, like baking a beautiful cake for a milestone birthday.
Today, I am thrilled to share a recipe that perfectly embodies this philosophy: an Elegant 23rd Birthday Cake. This isn’t just any cake; it’s a statement, a gesture, and frankly, a remarkably stress-free project when you approach it with a bit of planning. My goal is always to share realistic, budget-friendly meal prep plans, but also to show how those efficient habits extend to making extraordinary things happen in your kitchen without adding undue pressure. This homemade cake recipe is designed to be approachable, yielding stunning results that will make her 23rd birthday truly memorable. Let’s get baking!
Table of Contents
- From Busy Weeks to Beautiful Bakes: Making Time for Milestone Moments
- Why This Recipe Works
- Ingredients You’ll Need
- Step-by-Step Instructions for Your Elegant Cake
- Olivia’s Pro Tips for a Flawless Finish
- Variations & Substitutions: Tailoring Your Cake to Perfection
- Frequently Asked Questions About This Elegant Birthday Cake
- Final Thoughts: Making Every Occasion Memorable
Why This Recipe Works
This particular elegant birthday cake recipe stands out for several practical reasons, making it an ideal choice for a busy home baker looking to create something truly special without added stress. I’ve refined this method to ensure that it’s not only delicious but also highly manageable, fitting perfectly into a week where you might already be batch-cooking other essentials.
- Efficiency Without Compromise: This recipe utilizes straightforward techniques and commonly found ingredients, ensuring that you won’t spend hours searching for exotic items or mastering complex baking methods. The steps are clear and sequential, allowing you to move through the process with a sense of calm and control. Even though the final product looks incredibly sophisticated, the underlying process is surprisingly simple, making it achievable for bakers of all experience levels.
- Versatility for Personalization: While we aim for an elegant 23rd birthday cake, the base recipe is incredibly adaptable. This means you can easily customize the flavors and decorations to perfectly suit her individual preferences. Whether she adores a hint of almond, a burst of citrus, or a specific color palette, this cake serves as a perfect canvas. This flexibility ensures that the cake feels truly personal, making the effort even more significant.
- Impressive Presentation, Manageable Effort: The beauty of this recipe lies in its ability to deliver a visually stunning dessert with minimal fuss. By focusing on proper technique for baking and a few simple decorating tricks, you can achieve a professional-looking finish right in your home kitchen. This balance of aesthetic appeal and practical execution means you can present an exquisite birthday cake that looks like it came from a high-end bakery, all while staying within a budget-friendly framework and managing your time efficiently.
Ingredients You’ll Need
Having all your ingredients measured and ready before you begin is a cornerstone of efficient baking. This mise en place approach ensures a smooth process, preventing any last-minute rushes or forgotten items. For the best results, ensure your butter, eggs, and milk are at room temperature before you start.
For the Cake:
- 2 ½ cups all-purpose flour
- 1 ½ cups granulated sugar
- 1 tablespoon baking powder
- ½ teaspoon salt
- 1 cup (2 sticks) unsalted butter, softened to room temperature
- 4 large eggs, at room temperature
- 1 cup whole milk, at room temperature
- 2 teaspoons vanilla extract (for cake)
For the Vanilla Buttercream:
- 1 cup (2 sticks) unsalted butter, softened to room temperature
- 4 cups powdered sugar, sifted (this is crucial for a smooth buttercream!)
- ¼ cup whole milk or heavy cream (for buttercream), at room temperature
- 2 teaspoons vanilla extract (for buttercream)
- Pinch of salt (for buttercream)
Optional Decoration Elements:
- Pink or desired food coloring gel (gel colors provide vibrant hues without thinning the frosting)
- Assorted sprinkles (e.g., gold, white, pink for an elegant touch)
- Edible glitter (optional, for extra sparkle)
- Fresh berries or small edible flowers (optional, ensure they are food-safe and thoroughly washed)
Step-by-Step Instructions for Your Elegant Cake
Following these instructions precisely will help ensure your elegant birthday cake turns out perfectly. Remember, baking is a science, so attention to detail truly matters here!
Part 1: Preparing the Cake Layers
- Preheat and Prepare: Begin by preheating your oven to 350°F (175°C). This ensures a consistently heated environment for even baking. Next, grease and flour two 8-inch round cake pans. A simple trick is to spray with baking spray (which contains flour) or grease thoroughly with butter, then dust with flour, tapping out any excess. This prevents sticking and ensures your beautiful layers release cleanly.
- Combine Dry Ingredients: In a large mixing bowl, whisk together the all-purpose flour, granulated sugar, baking powder, and ½ teaspoon of salt. Whisking ensures these ingredients are evenly distributed, which is essential for proper leavening and flavor throughout the cake. Set this bowl aside.
- Cream Wet Ingredients (Part 1): In a separate, larger mixing bowl (or the bowl of a stand mixer fitted with the paddle attachment), beat the 1 cup of softened unsalted butter on medium speed until it is light and fluffy. This usually takes about 2-3 minutes. Proper creaming incorporates air, which contributes to the cake’s light texture.
- Incorporate Eggs and Extracts: Add the 4 large eggs to the creamed butter, one at a time, beating well after each addition until fully incorporated. Scrape down the sides of the bowl as needed. Once the eggs are in, gently stir in the 1 cup of whole milk and the 2 teaspoons of vanilla extract designated for the cake. Mix until just combined.
- Combine Wet and Dry: Gradually add the dry ingredients mixture to the wet ingredients, mixing on low speed until just combined. It is absolutely crucial not to overmix the batter at this stage. Overmixing develops the gluten in the flour too much, which can result in a tough, dense cake. Mix only until no streaks of dry flour remain.
- Divide and Bake: Divide the cake batter evenly between your two prepared 8-inch round cake pans. You can use a kitchen scale for precision if you wish, ensuring even layers. Place the pans in the preheated oven and bake for 25-30 minutes, or until a wooden skewer or toothpick inserted into the center of a cake comes out clean.
- Cooling Process: Once baked, remove the cakes from the oven and let them cool in their pans on a wire rack for 10 minutes. This allows them to firm up slightly before handling. After 10 minutes, carefully invert the cakes onto the wire rack to cool completely. Ensure they are entirely cool before frosting; otherwise, your buttercream will melt and slide right off.
Part 2: Crafting the Vanilla Buttercream
- Cream the Butter: In a large bowl (or the bowl of a stand mixer with the paddle attachment), beat the 1 cup of softened unsalted butter on medium speed until it is creamy and smooth, about 2-3 minutes. This forms the essential base for your rich buttercream.
- Gradually Add Powdered Sugar: With the mixer on low speed, gradually add the 4 cups of sifted powdered sugar, alternating with the ¼ cup of whole milk or heavy cream. Start and end with powdered sugar. Mix until smooth and fluffy. If the buttercream seems too stiff, add a tiny bit more milk (a teaspoon at a time) until it reaches your desired consistency. If it’s too thin, add more sifted powdered sugar.
- Flavor and Finish: Beat in the 2 teaspoons of vanilla extract (for buttercream) and a pinch of salt. The salt helps to balance the sweetness of the sugar. Continue beating on medium-high speed for another 2-3 minutes until the buttercream is light, airy, and truly fluffy.
- Optional Coloring: If you desire a specific color, such as pink for a feminine touch, add a few drops of food coloring gel at this stage. Mix on low speed until the color is evenly distributed throughout the buttercream. Gel colors are preferred as they don’t add excess liquid.
Part 3: Assembling and Decorating Your Cake
- Level the Cakes (Optional but Recommended): If your cake layers have domed tops, use a serrated knife or a cake leveler to carefully trim them flat. This creates a stable, even surface for stacking and a more polished final appearance.
- First Layer and Filling: Place one completely cooled cake layer on your chosen serving plate or cake stand. Spread about ½ cup of buttercream evenly over the top, extending almost to the edges.
- Stack the Second Layer: Carefully place the second cake layer on top of the first, aligning it as best as possible. Gently press down to ensure it’s secure.
- Crumb Coat: Apply a very thin layer of buttercream over the entire cake – top and sides. This is called a crumb coat, and its purpose is to trap any loose crumbs, preventing them from showing up in your final frosting layer. Chill the cake in the refrigerator for 15-20 minutes to set the crumb coat. This step is essential for a clean, elegant finish.
- Final Frosting: Once the crumb coat is firm, apply the remaining buttercream. Use an offset spatula or a bench scraper to create smooth sides and a level top. Take your time with this step; neatness here makes a significant difference in the overall presentation.
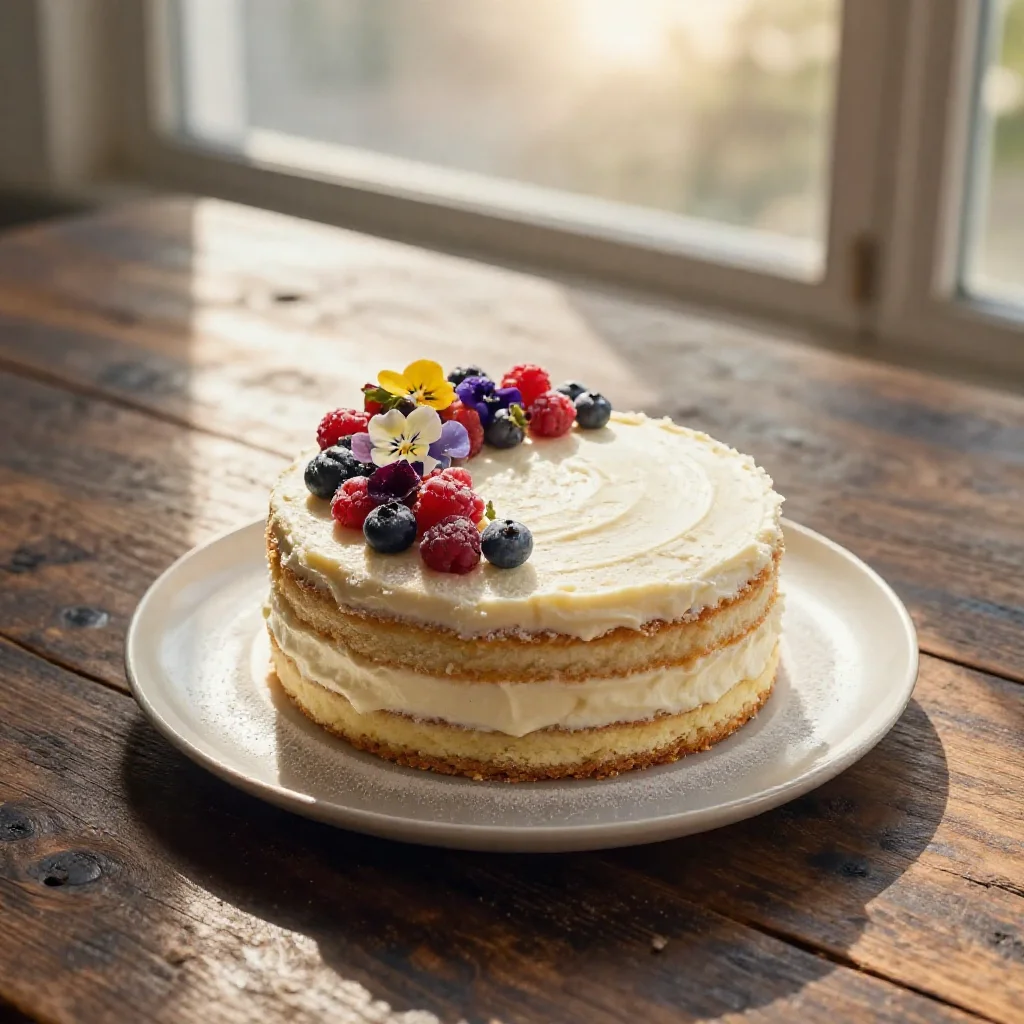
- Decorate with Flair: Now for the fun part! Decorate your elegant 23rd birthday cake with assorted sprinkles, edible glitter, fresh berries, or small edible flowers as desired. For a truly sophisticated look, consider a minimalist arrangement of just a few elements. You could also use a piping bag with a decorative tip for borders or simple designs.
Olivia’s Pro Tips for a Flawless Finish
Achieving a truly elegant birthday cake at home is absolutely within reach, especially when you arm yourself with a few expert insights. These practical tips, honed from years of balancing baking with a busy schedule, will help you produce a stunning result that looks like it came straight from a professional bakery.
- Temperature Matters Immensely: I cannot stress this enough: ensure your butter, eggs, and milk are all at true room temperature. This isn’t just a suggestion; it’s a foundational step for cake success. Room temperature ingredients emulsify much better, meaning they combine smoothly and evenly, creating a uniform batter and a truly fluffy buttercream. Cold ingredients will result in a lumpy batter or a curdled-looking frosting, impacting the texture and appearance significantly. Take them out of the refrigerator at least an hour before you plan to bake.
- The Gentle Hand of Mixing: When combining your wet and dry ingredients for the cake batter, mix only until the flour streaks disappear. Overmixing is the arch-nemesis of a tender cake. It develops the gluten in the flour too much, leading to a dense, tough texture that no amount of beautiful frosting can redeem. A few gentle folds with a spatula after the initial mixing can often ensure everything is just combined without overworking it.
- Mastering the Crumb Coat: This simple step is the secret weapon for a professional-looking cake finish. After your cake layers are stacked, apply a very thin layer of buttercream over the entire cake. This “crumb coat” effectively locks in any loose crumbs, preventing them from migrating into your final, pristine layer of frosting. Pop the cake into the refrigerator for 15-20 minutes to firm up this layer before applying the remaining buttercream. This creates a smooth, clean canvas for your elegant exterior.
- Patience is a Virtue, Especially with Cooling: It’s tempting to rush to the frosting stage, but resist the urge! Your cake layers must be completely, unequivocally cool before you even think about applying buttercream. Warm cake will melt your carefully prepared frosting into a gooey mess, making it impossible to achieve smooth sides and sharp edges. Plan ahead and allow ample cooling time, ideally on a wire rack to allow air circulation all around the cake.
- Strategic Decoration for Elegance: For an elegant 23rd birthday cake, sometimes less is more. Instead of overwhelming the cake with too many elements, choose one or two focal points. A delicate scattering of gold sprinkles, a few perfectly placed fresh berries, or a simple, sophisticated piped border can elevate the cake tremendously. Consider the overall color scheme and how your chosen decorations will complement it. For more detailed insights on presentation, you might find our celebration cake guide quite helpful for general decorating principles.
Variations & Substitutions: Tailoring Your Cake to Perfection
One of the aspects I truly appreciate about this elegant birthday cake recipe is its incredible adaptability. While the classic vanilla base is universally appealing, there are countless ways to customize it to fit the birthday girl’s specific tastes or to simply add your unique flair. This flexibility ensures that every cake you bake can be a distinct expression of care, making it even more special.
Flavor Enhancements for the Cake:
- Citrus Zest: For a bright, zesty twist, add the finely grated zest of one lemon or orange to your dry ingredients. The oils in the zest will infuse the cake with a refreshing aroma and taste.
- Almond Extract: Substitute half of the vanilla extract in the cake batter with almond extract for a delicate, sophisticated flavor profile. Be mindful that almond extract is potent, so a little goes a long way.
- Coffee Infusion: For a subtle depth, dissolve 1 teaspoon of instant espresso powder in the warm milk before adding it to the batter. This enhances the vanilla without making the cake taste overtly like coffee. If she prefers a more robust flavor, you might even consider a rich chocolate cake for a completely different but equally impactful dessert.
Buttercream Customizations:
- Cream Cheese Frosting: For a tangier, less sweet alternative, you could opt for a classic cream cheese frosting. Ensure your cream cheese is softened, then beat it with butter, powdered sugar, and vanilla.
- Fruit Puree: Fold a few tablespoons of cooled, strained fruit puree (like raspberry or strawberry) into a portion of your buttercream for a natural color and fruity flavor. This works beautifully as a filling between layers.
- Chocolate Buttercream: Melted and cooled chocolate, or unsweetened cocoa powder, can transform the vanilla buttercream into a luxurious chocolate version. This would pair excellently with the vanilla cake base.
Decorative Alternatives:
- Fresh Flowers: Beyond berries, consider using food-safe fresh flowers like pansies, violas, or small roses. Always ensure they are organic and have not been treated with pesticides. Arrange them artfully on top or around the base.
- Personalized Toppers: A simple cake topper with her initial, age, or a custom message can add a modern, personal touch. Many affordable options are available online.
- Piped Designs: If you’re comfortable with a piping bag, simple rosettes, stars, or shell borders can add texture and dimension to the cake. Even a basic border around the top and bottom edges can make a significant difference. If you’re looking to scale down for individual servings, similar decorating techniques can be applied to classic vanilla cupcakes.
Dietary Considerations:
- Gluten-Free: You can typically substitute the all-purpose flour with a 1:1 gluten-free baking flour blend that contains xanthan gum. Be aware that the texture might be slightly different.
- Dairy-Free: For a dairy-free version, use plant-based milk (almond or oat milk work well) and a high-quality dairy-free butter alternative for both the cake and the buttercream.
By exploring these variations, you can ensure that this elegant birthday cake is not only visually stunning but also perfectly tailored to be the ultimate dessert for her special day. Don’t be afraid to experiment and make it truly your own!
Frequently Asked Questions About This Elegant Birthday Cake
I often receive questions about making special occasion cakes, especially when trying to balance a busy schedule with creating something memorable. Here are some of the most common inquiries I get about baking and preparing an elegant birthday cake, designed to help you achieve success with minimal fuss.
Can I make this elegant birthday cake ahead of time?
Absolutely! This recipe is fantastic for meal prepping and batch-cooking components to reduce stress on the actual day. You can bake the cake layers up to 2-3 days in advance. Once completely cooled, wrap each layer tightly in plastic wrap and store them at room temperature or in the refrigerator. For longer storage, freeze them for up to a month. The buttercream can also be made 2-3 days ahead of time and stored in an airtight container in the refrigerator. Before using, let it come to room temperature and re-whip it for a few minutes until fluffy again. Assembling and frosting can then be done the day before the event, allowing you to focus on other aspects of the celebration.
How should I store the finished cake?
Once fully assembled and frosted, this elegant birthday cake is best stored in an airtight cake carrier at room temperature for up to 2 days. If your kitchen is particularly warm, or if you’ve used a perishable filling (like fresh fruit puree), it’s safer to store the cake in the refrigerator. If refrigerated, let it sit at room temperature for at least 30-60 minutes before serving to ensure the buttercream softens and the cake’s flavors are at their prime. This ensures the cake remains delicious and presents beautifully.
What if my buttercream is too thin or too thick?
Don’t worry, this is a common occurrence and easily remedied! If your buttercream is too thin, gradually add more sifted powdered sugar (a tablespoon at a time) while mixing on low speed until it reaches your desired consistency. If it’s too thick or stiff, add a very small amount of milk or heavy cream (a teaspoon at a time) until it becomes spreadable and smooth. Remember to always adjust slowly and mix well after each addition to see the full effect before adding more. Achieving the right consistency is key for a smooth, elegant finish on your birthday cake. For more general advice on tackling common baking issues, check out our comprehensive celebration cake guide.
Can I use different size cake pans for this recipe?
Yes, you can adapt this recipe for different size pans, but it will require adjusting baking times and potentially the number of layers. For instance, if you use three 6-inch round pans, the baking time will likely be shorter (around 20-25 minutes), and you’ll get taller, narrower layers. If you opt for a single 9×13 inch rectangular pan, the baking time will be longer (closer to 35-45 minutes). Always monitor the cake closely with a wooden skewer test. Remember that pan size directly impacts how the heat penetrates the batter, so adjustments are essential to prevent over or under-baking. For other milestone occasions that might require different cake formats, our graduation cake ideas offer some excellent inspiration.
Final Thoughts: Making Every Occasion Memorable
As we wrap up our journey with this elegant 23rd birthday cake, I hope you feel equipped and inspired to create something truly special in your own kitchen. For me, Olivia, the satisfaction of presenting a homemade cake like this goes beyond just the dessert itself. It’s a tangible outcome of my philosophy: that with a bit of organization and strategic planning—the very essence of efficient meal prepping and batch-cooking—we can free up time and energy to invest in the moments and people that matter most.
This cake, with its refined appearance and delightful flavor, is a testament to the fact that you don’t need to be a professional baker to produce something extraordinary. It’s about careful steps, quality ingredients, and the personal touch that only a homemade creation can offer. Imagine her reaction as she sees this beautiful cake, knowing the care and thought you poured into making her 23rd birthday truly shine. It’s these kinds of gestures that build lasting impressions and create cherished memories, far beyond the lifespan of any single dessert.
So, go ahead, gather your ingredients, follow these practical steps, and transform your kitchen into a place of creation. Embrace the process, know that you’re capable of crafting something magnificent, and most importantly, enjoy the opportunity to make her special day even more significant. I truly believe that investing in these moments, much like investing a few hours in Sunday meal prep, pays dividends in a more relaxed, fulfilling life. Give this elegant birthday cake a try; you’ll be so pleased with the outcome, and she will undoubtedly appreciate the thoughtful effort.
”
}
Beautiful 23rd Birthday Cake For Her
Ingredients
Method
- Preheat oven to 350°F (175°C). Grease and flour two 8-inch round cake pans. Whisk dry ingredients (flour, sugar, baking powder, salt) in a large bowl.
- In a separate bowl, cream 1 cup softened butter until fluffy. Beat in eggs one at a time, then stir in 1 cup milk and 2 teaspoons vanilla extract.
- Gradually add dry ingredients to wet, mixing until just combined. Do not overmix.
- Divide batter evenly between pans. Bake for 25-30 minutes, or until a skewer comes out clean. Cool in pans for 10 minutes, then transfer to a wire rack to cool completely.
- For buttercream: Beat 1 cup softened butter until creamy. Gradually add sifted powdered sugar, alternating with ¼ cup milk/cream, until smooth. Beat in 2 teaspoons vanilla and a pinch of salt. Add food coloring if desired.
- Once cakes are cool, place one layer on a plate. Spread about ½ cup buttercream, then top with the second layer.
- Frost the entire cake with remaining buttercream. Decorate with sprinkles, edible glitter, berries, or flowers for a beautiful presentation.
Notes
Loved this recipe? Save it to your favorite Pinterest board so you can easily find it later! ✨
