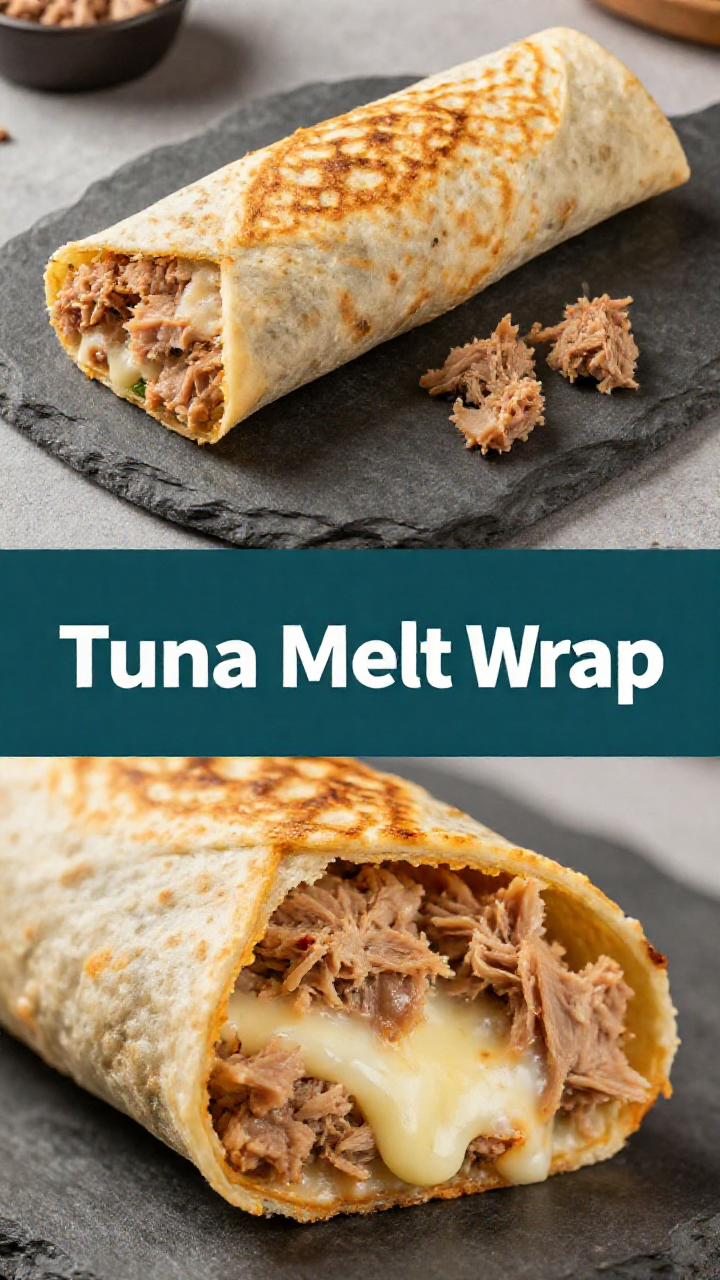
In the heart of ‘The Artisan’s Ledger,’ we don’t just share recipes; we share a philosophy. A belief that even the simplest meals can be crafted with intention, transforming everyday routines into moments of mindful creation. Today, we embark on a journey to elevate the humble tuna melt into something extraordinary: a Healthy Tuna Melt Wrap, ready in just 10 minutes. This isn’t just about speed; it’s about consciously choosing wholesome ingredients and time-honored techniques, even when time is short. This recipe is a testament to the idea that quality and convenience can coexist, that you don’t have to sacrifice flavor or nutrition for the sake of a quick lunch.
This tuna melt wrap isn’t just another recipe; it’s an invitation to rediscover the joy of simple, well-made food. It’s about taking a few moments out of your busy day to create something nourishing and satisfying, a small act of self-care in a world that often feels too fast-paced. It’s a reminder that even the quickest of meals can be an opportunity to connect with the ingredients, the process, and ultimately, yourself.
Why You’ll Love This Tuna Melt Wrap
This tuna melt wrap is more than just a quick lunch; it’s a game-changer for busy individuals seeking healthy and flavorful options. Here’s why this recipe will become a staple in your meal rotation:
- Speed and Simplicity: Ready in just 10 minutes, perfect for those hectic weekdays.
- Healthy and Nutritious: Packed with protein, healthy fats, and essential nutrients.
- Customizable: Easily adaptable to your dietary preferences and available ingredients.
- Delicious Flavor: A harmonious blend of creamy, tangy, and savory elements.
- Portable and Convenient: Ideal for taking to work, school, or on the go.
If you are looking for a healthy lunch idea that’s both quick and delicious, this tuna melt wrap is the perfect solution. It’s a simple recipe that delivers big on flavor and nutrition, making it a win-win for anyone seeking a satisfying and wholesome meal.
Ingredients for the Perfect Tuna Melt Wrap
Here’s what you’ll need to make this delectable tuna melt wrap. Each ingredient plays a vital role in creating a balanced and flavorful experience:
- Skipjack Tuna, 5 oz (or Yellowfin): The heart of our wrap. Opt for tuna packed in water for a healthier choice.
- Greek Yogurt, 2 Tbsp: Adds creaminess and a protein boost while keeping the fat content low.
- Dijon Mustard, ½ Tbsp (or Regular Mustard): Provides a tangy kick that complements the tuna perfectly.
- Lemon Juice, ½ Lemon (about 1 Tbsp): Brightens the flavors and adds a touch of acidity.
- Corn, ¼ cup: Introduces a hint of sweetness and a satisfying crunch.
- Red Onion, diced, ¼ cup (about 1/4 of a red onion): Offers a sharp, pungent flavor that balances the richness of the tuna.
- Dill Relish, 1 Tbsp (or Capers): Adds a briny, herbaceous note that elevates the overall taste.
- Garlic Powder, ½ tsp: Enhances the savory profile with its subtle, aromatic warmth.
- Black Pepper, ¼ tsp: A simple yet essential seasoning that ties all the flavors together.
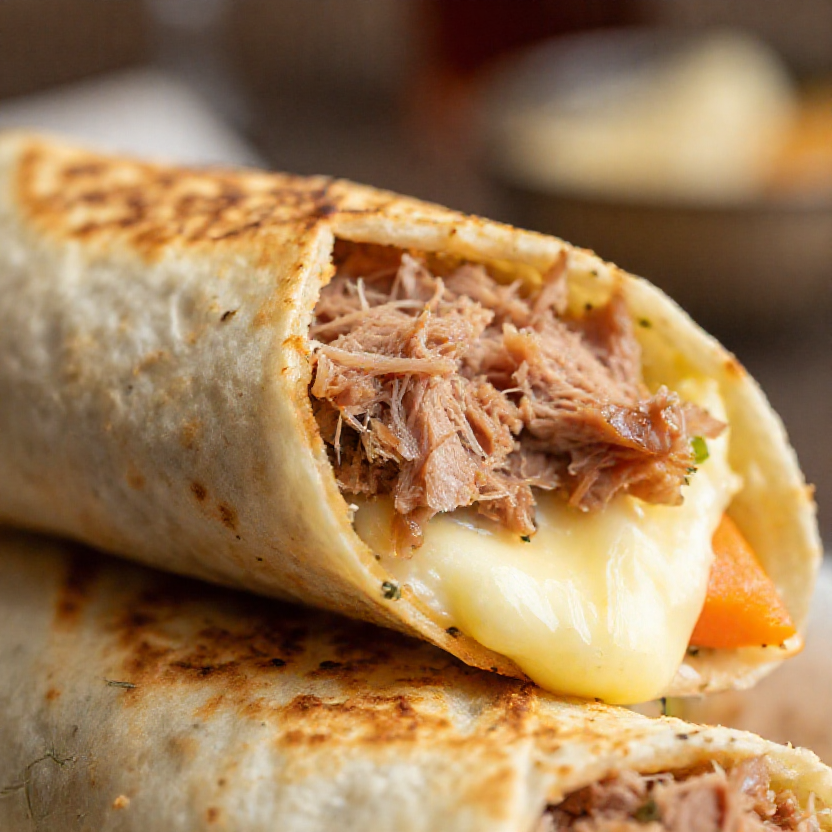
- Shredded Mozzarella Cheese, ¼ cup (or Cheese of Choice): Provides a melty, gooey texture and a mild, creamy flavor.
- Wrap, at least 10 inches in size (burrito sized): The vessel that holds all the deliciousness together. Choose a whole-wheat or gluten-free option for added health benefits.
Step-by-Step Guide to Making Your Tuna Melt Wrap
This tuna melt wrap recipe is incredibly easy to follow. Here’s a detailed guide to ensure your wrap turns out perfectly every time:
- Prepare the Tuna Mixture: Drain the tuna thoroughly. In a medium bowl, combine the drained tuna with Greek yogurt, Dijon mustard, lemon juice, corn, red onion, relish, garlic powder, and black pepper. Mix well until all ingredients are evenly distributed. This tuna mixture is the foundation of our delicious wrap.
- Prepare the Wrap: To make the wrap more pliable and easier to work with, cover it with a damp paper towel and microwave for 10-20 seconds. This will prevent it from cracking or tearing when you fold it. Place the warmed wrap on a clean working surface.
- Assemble the Wrap: Add a layer of shredded cheese on the end of the wrap closest to you, leaving at least an inch of space on the sides and bottom edge. This will help prevent the cheese from melting out during cooking. Spread the tuna mixture evenly on top of the cheese.
- Fold the Wrap: To create a secure and tidy wrap, fold the sides of the tortilla toward the middle. Then, fold the bottom of the tortilla up and over the filling, tucking the edges of the wrap under as you roll it away from you to the edge.
- Cook the Wrap: Heat a skillet or grill pan on medium heat and add a bit of olive oil. Place the wrap on the hot pan, seam side down. Let it cook for about 3-4 minutes, gently pressing on it a couple of times while it heats. Flip the wrap and cook for another 2-3 minutes, or until it is golden brown and the cheese is melted. If it’s cooking too quickly, lower the heat to medium-low.
Pro Tips for the Best Tuna Melt Wrap
Here are some expert tips to elevate your tuna melt wrap to the next level:
- Quality Ingredients: Use high-quality tuna and fresh ingredients for the best flavor.
- Don’t Overfill: Avoid overfilling the wrap to prevent it from tearing and making it difficult to fold.
- Press Gently: When cooking the wrap, gently press down on it with a spatula to ensure even heating and melting of the cheese.
- Control the Heat: Adjust the heat as needed to prevent the wrap from burning before the cheese is fully melted.
- Experiment with Cheese: Try different types of cheese, such as cheddar, provolone, or pepper jack, to customize the flavor.
These tips will help you create a tuna melt wrap that is not only delicious but also perfectly cooked and easy to handle. If you want to make this recipe even better, consider these suggestions.
Common Mistakes to Avoid
Even with a simple recipe like this, there are a few common mistakes to watch out for:
- Using a Dry Wrap: A dry wrap is more likely to crack or tear. Always warm it with a damp paper towel before folding.
- Overfilling the Wrap: Too much filling will make it difficult to fold and cook the wrap evenly.
- Cooking on High Heat: Cooking on high heat can cause the wrap to burn before the cheese is melted. Use medium heat and adjust as needed.
- Not Draining the Tuna Properly: Excess water from the tuna can make the wrap soggy. Always drain the tuna thoroughly before mixing it with the other ingredients.
- Skipping the Pressing Step: Pressing the wrap while cooking helps ensure even heating and melting of the cheese.
By avoiding these common mistakes, you can ensure that your tuna melt wrap turns out perfectly every time. Don’t let these errors ruin your wrap!
Tuna Melt Wrap Variations
One of the best things about this recipe is its versatility. Here are a few variations to try:
- Spicy Tuna Melt Wrap: Add a pinch of red pepper flakes or a dash of hot sauce to the tuna mixture for a spicy kick.
- Avocado Tuna Melt Wrap: Add sliced avocado to the wrap for a creamy texture and healthy fats.
- Vegetarian Tuna Melt Wrap: Substitute the tuna with mashed chickpeas for a vegetarian option.
- Mediterranean Tuna Melt Wrap: Add chopped olives, sun-dried tomatoes, and feta cheese to the tuna mixture for a Mediterranean twist.
- BBQ Tuna Melt Wrap: Mix a tablespoon of your favorite BBQ sauce into the tuna mixture for a smoky and tangy flavor.
These variations allow you to customize the recipe to your liking and create a tuna melt wrap that is perfect for your taste buds. Make this recipe your own and i hope you enjoy it!
Storage Instructions
If you have leftovers or want to meal prep these wraps, here’s how to store them properly:
- Refrigerating Cooked Wraps: Wrap the cooked tuna melt wrap tightly in plastic wrap or aluminum foil and store it in the refrigerator for up to 2 days. Reheat in a skillet or microwave before serving.
- Storing Tuna Mixture: The tuna mixture can be stored in an airtight container in the refrigerator for up to 3 days. Assemble the wraps just before cooking to prevent them from becoming soggy.
- Freezing: Freezing the wraps is not recommended as the texture may change upon thawing.
Proper storage will help maintain the quality and flavor of your tuna melt wrap. To make this, plan accordingly!
Frequently Asked Questions (FAQ)
Here are some common questions about making tuna melt wraps:
- Can I use different types of tuna?: Yes, you can use any type of tuna you prefer, such as albacore or yellowfin. Just be sure to drain it well. Also be mindful of mercury levels in tuna. You want to check that.
- Can I use regular mayonnaise instead of Greek yogurt?: Yes, but Greek yogurt is a healthier alternative that adds creaminess with fewer calories and more protein.
- Can I add other vegetables?: Absolutely! Feel free to add any vegetables you like, such as spinach, bell peppers, or cucumbers.
- Can I make this wrap ahead of time?: You can prepare the tuna mixture ahead of time, but it’s best to assemble and cook the wrap just before serving to prevent it from becoming soggy.
- Can I grill the wrap instead of using a skillet?: Yes, grilling the wrap will give it a nice smoky flavor.
These FAQs should address any questions you may have about making this delicious tuna melt wrap. If you have more questions, feel free to ask!
Serving Suggestions
Here are some serving suggestions to complete your meal:
- Side Salad: Serve the tuna melt wrap with a side salad for a light and refreshing meal.
- Soup: Pair it with a bowl of tomato soup or vegetable soup for a comforting and satisfying lunch.
- Fruit Salad: Add a fruit salad for a sweet and healthy complement.
- Chips or Fries: If you’re craving something a bit more indulgent, serve the wrap with a side of chips or fries.
These serving suggestions will help you create a well-rounded and enjoyable meal with your tuna melt wrap. Below are some other ideas for you to consider.
This Healthy Tuna Melt Wrap recipe is more than just a quick lunch; it’s a testament to the idea that even the simplest meals can be crafted with intention and care. By using wholesome ingredients and following these easy steps, you can create a satisfying and nutritious meal in just 10 minutes. I hope this recipe inspires you to embrace the art of intentional creation in your own kitchen. The recipe card is below. Enjoy!

Healthy Tuna Melt Wrap Recipe, Easy 10 Minute Lunch
Ingredients
Method
- Drain tuna and combine with Greek yogurt, dijon mustard, lemon juice, corn, red onion, relish, garlic powder, and black pepper. Mix to combine.
- Heat wrap to make pliable. Add cheese and tuna mixture.
- Fold sides and bottom of tortilla, then roll up.
- Heat skillet with olive oil. Cook wrap seam side down for 3-4 minutes, flip and cook for 2-3 minutes.
Notes