
Welcome back to TastyNiche.com, my lovely friends! Today, I’m thrilled to share with you a delightful treat that’s sure to bring a smile to your face and a sprinkle of spooky fun to your kitchen: the Spiderweb Chocolate Cake! Now, I know what you might be thinking—baking a cake that looks so elaborate might seem intimidating. But fear not! I’m here to guide you step-by-step, because cooking is all about having fun and embracing our little mishaps along the way. Remember, the best meals come from our own kitchens filled with love and creativity.
This cake is perfect for any occasion, whether you’re hosting a Halloween party, celebrating a birthday, or simply treating yourself (you deserve it!). With its rich chocolate flavor and whimsical spiderweb design, this cake is sure to impress your family and friends. So, let’s roll up our sleeves and unleash our inner bakers together!
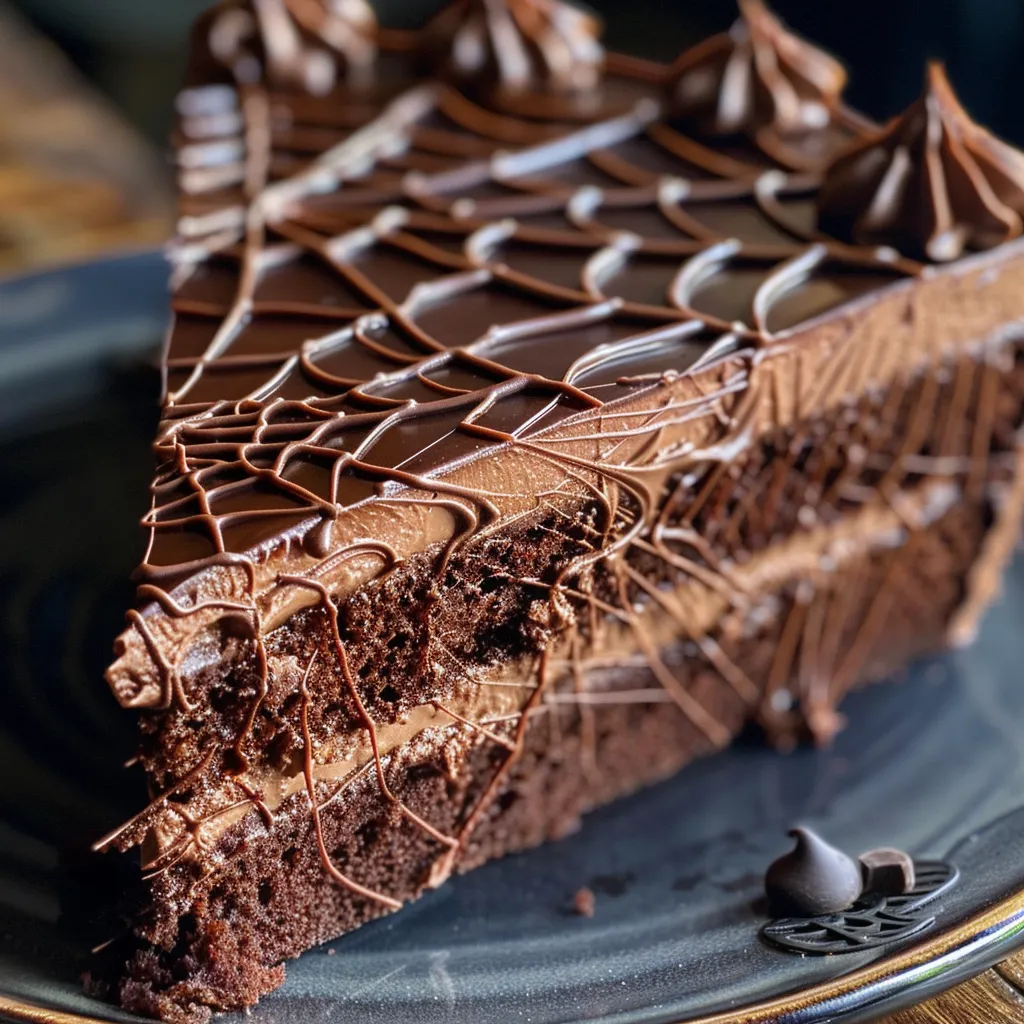
Why You’ll Absolutely Love This Spiderweb Chocolate Cake
There are so many reasons to adore this cake, and I can’t wait to share them with you! Here’s what makes this Spiderweb Chocolate Cake truly special:
- It’s visually stunning! The spiderweb design adds a fun touch that’s perfect for Halloween or any festive gathering.
- Rich, moist chocolate flavor that will satisfy any chocolate lover’s cravings.
- Simple ingredients that you probably already have in your pantry, making it easy to whip up on a whim.
- It’s a great project to do with family or friends—baking together creates sweet memories!
Ingredients You’ll Need
Let’s chat about the ingredients that will make this cake come to life. We’re working with some classic staples that are easy to find and absolutely delicious. Here’s what you’ll need:
- 1 3/4 cups all-purpose flour
- 1 1/2 cups sugar
- 3/4 cup cocoa powder (the star of the show!)
- 1 1/2 tsp baking powder
- 1 1/2 tsp baking soda
- 1 tsp salt
- 2 eggs
- 1 cup milk
- 1/2 cup vegetable oil
- 2 tsp vanilla extract
- 1 cup boiling water
- Chocolate frosting (homemade or store-bought, your choice!)
- 1/2 cup white chocolate chips, melted
You’ll find the full ingredient list with measurements in the recipe card below!
How to Make This Spiderweb Chocolate Cake, Step-by-Step
Now, let’s dive into the fun part—baking! Follow these easy steps, and I promise you’ll have a show-stopping cake ready in no time.
- First, preheat your oven to 350°F (175°C). While that’s warming up, grease and flour two 9-inch round baking pans. This will ensure our cakes come out perfectly!
- In a large bowl, combine the flour, sugar, cocoa powder, baking powder, baking soda, and salt. Give it a little whisk to mix everything together.
- Add the eggs, milk, oil, and vanilla extract to the dry ingredients. Beat on medium speed until the mixture is smooth and well combined. Don’t worry if it looks a bit lumpy at first—just keep mixing!
- Now for the secret ingredient: stir in the boiling water. This will make the batter thin, but that’s exactly what we want for a moist cake.
- Pour the batter evenly into the prepared pans and pop them in the oven. Bake for 30-35 minutes, or until a toothpick inserted into the center comes out clean. Your kitchen will smell heavenly!
- Once baked, let the cakes cool in the pans for about 10 minutes before transferring them to a wire rack to cool completely.
- Once cooled, stack the cakes with a generous layer of frosting in between. Then, frost the top and sides of the cake so it’s beautifully covered.
- For the fun part—drizzle the melted white chocolate in a spiral pattern on top of the cake. Using a toothpick, drag lines from the center to the edges to create that spooky spiderweb effect.
- Slice it up, serve, and enjoy your creation!

Pro Tips for the Best Results
Here are a few of my favorite tips to help you achieve the best results:
- Make sure all your ingredients are at room temperature before you start mixing. This helps everything blend together smoothly.
- Don’t skip the cooling time! Allowing the cakes to cool properly prevents them from becoming mushy when you frost them.
- If you want a more intense chocolate flavor, feel free to add an extra tablespoon of cocoa powder to the batter.
Serving Suggestions
This Spiderweb Chocolate Cake is gorgeous on its own, but here are a few creative serving suggestions to elevate your dessert:
- Serve slices with a scoop of vanilla ice cream for a delightful contrast of flavors.
- Top each slice with fresh berries for a pop of color and extra sweetness.
- Dust with powdered sugar for a snowy effect, especially if you’re serving during the winter months.
Storage and Make-Ahead Tips
If you find yourself with leftover cake (which is rare, but it happens!), here’s how to store it:
- Store any leftovers in an airtight container at room temperature for up to 3 days.
- If you want to make it ahead of time, you can bake the cakes, cool them, and wrap them tightly in plastic wrap. They can be stored in the freezer for up to 2 months. Just thaw before frosting!
There you have it, my friends! A fun and fabulous Spiderweb Chocolate Cake that’s as delicious as it is beautiful. I hope you give this recipe a try and enjoy the process as much as I do. Remember, the kitchen is your playground, so have fun experimenting and making it your own. Happy baking!
Spiderweb Chocolate Cake
Ingredients
Method
- Preheat oven to 350°F (175°C). Grease and flour two 9-inch pans.
- Mix dry ingredients, then add eggs, milk, oil, vanilla; beat until smooth.
- Stir in boiling water until batter is thin. Divide into pans and bake 30-35 mins.
- Cool, stack with frosting, then frost top and sides. Drizzle white chocolate in a spiral, drag lines to create web.